Quick Reference
Usage: appendpdf [options] paramFile1 [paramFile2 ...]]
Usage: appendpro [options] paramFile1 [paramFile2 ...]]

-b                  : Include bookmarks
-eb                 : Include embedded files
-extra              : Include named destination links and bookmarks, article threads (recommended)

The Following parameters are available in AppendPDF Pro only

-f                  : Number from first page in output document
-u <string>         : Remove old stamps with UndoLabel

-listfonts          : Print list of available fonts in the appligent_home fonts folder

-portfolio <string> : Build Portfolio; options "icons" or "details", also called portable collections

-vars               : List of variables to be substituted in the Cover, TOC, or Extras stamp File
                      Example variable list - ( "name,value,name,value" )
-vardelimiter       : Delimiter character for variables in the Stamp File ( default is % )

Save Options

-i                  : Save using an incremental save
-w                  : Save as linearized pdf
-optimize           : Optimize the output file to try to reduce file size
-nocomp             : Do not compress using Object Streams; compatible with all versions of Acrobat
-comp               : Compress using Object Streams; Acrobat 6 and later
-iso32000           : Set file for ISO 32000 compliance (PDF 1.7)
-o                  : Path to the output file or directory

Command List File

-cmds               : Path to the file of commands -cmds only compatible with General Options

Encryption Options

-encrypt            : Encrypt output file
-keylength <int>    : Key Length.  Valid options are 40 and 128.  Default is 128.
-ownerpass <string> : New Owner Password (Required)
-userpass <string>  : New User Password
-noprint            : Do Not Allow Printing
-nomodify           : Do Not Allow Modifying the Document
-nocopy             : Do Not Allow Copying text or graphics
-nonotes            : Do Not Allow Adding or changing notes or form fields
-nofill             : Do Not Allow Fill or Sign of Form Fields
-noaccess           : Do Not Allow Accessibility
-noassembly         : Do Not Allow Document Assembly
-nohighres          : Do Not Allow High Resolution Printing

General Options

-v                  : Version information
-help               : Help information
-h                  : Help information
-l                  : Log to a file
-p                  : Show progress information
-n                  : Show no information on the screen
-r <string>         : Product registration code
Introduction
Overview
AppendPDF and AppendPDF Pro provide a fast and efficient way to combine documents dynamically and on-demand. This documentation provides instructions for both AppendPDF and AppendPDF Pro. Content specific to AppendPDF Pro is followed by a notation: (AppendPDF Pro only).
With AppendPDF and AppendPDF Pro you can:
- Combine documents
- Combine page ranges and sections from a series of documents
- Add Document Information
- Generate a Table of Contents including corresponding PDF bookmarks (AppendPDF Pro only)
- Add a Cover page (AppendPDF Pro only)
- Stamp information onto the finished document — Add watermarks, copyright information, headers or footers to further customize your document delivery (AppendPDF Pro only)
The final presentation is professional and complete.
AppendPDF and AppendPDF Pro use a parameter file to build the new PDF file from lists of several PDF files or specific pages from those files. Two versions of parameter files are supported:
- XML parameter files — Files coded in XML.
- Text parameter files — Plain text parameter files.
User Guide Conventions
This User Guide uses certain styles of text to indicate different things throughout the documentation. The following is a description of these styles:
- Command-line user input examples:
$appendpdfapp -r <Reg Number> -p -l <logfile.txt>
$appendproapp -r <Reg Number> -p -l <logfile.txt> (AppendPDF Pro only)
- Cross Reference to other locations in the documentation: AppendPDF Pro. Click the colored text to go to the referenced link.
- References to web sites for information: www.appligent.com. Click the colored text to open a browser to the website.
- Code snippets: <appendparam version=’1.0′>
- Content that is specific to AppendPDF Pro is followed by the notation: (AppendPDF Pro only).
You may see some paragraphs which look like the following:
Note: These paragraphs are special notes relating to the subject matter where they are located. It is recommended that you read all notes.
Note: For clarity, the examples in this User Guide use truncated path names. We recommend that you use full path names for all files.
Installation
Introduction
AppendPDF Pro is a command-line-driven application that appends pages of one or many PDF documents to create one new document. A cover page and a table of contents may be added, as well as stamped text and images. AppendPDF Pro is designed to run in tandem with other processes in an unattended environment and to handle high-volume and on-demand production needs.
Memory Requirements
Minimum free memory available to run the application: 512 MBytes.
Windows Installation
Windows installation is handled by the installer and does not require any special handling.
Unix Installation
Setting environmental variables (All Unix Platforms)
In this release, there are two additional environmental variables that need to be set for AppendPDF Pro on all UNIX platforms. If you run AppendPDF Pro from the appendpro script created during installation, these environmental variables will be set by the script. If you run appendproapp directly, you will need to set these environmental variables to run AppendPDF Pro. Once AppendPDF Pro is installed, you can view the variables needed by looking at the appendpro script created by the installer.
Setting the Appligent home directory (All Unix Platforms)
The environmental variable that stores the location of the Appligent home directory is APPLIGENT_HOME. The default location for the Appligent home directory is /usr/local/appligent. The Appligent home directory contains the library files and resources needed to run AppendPDF Pro. It also contains license information for AppendPDF Pro.
Example:
export APPLIGENT_HOME=/usr/local/appligent
Setting the APDFL library path (All Unix except AIX)
The APDFL library path must be added to the LD_LIBRARY_PATH variable. The APDFL library path is located in a subdirectory of the APPLIGENT_HOME directory.
The path should be set to ${APPLIGENT_HOME}/APDFLX.X.X/Libs.
Example:
export LD_LIBRARY_PATH=${LD_LIBRARY_PATH}:${APPLIGENT_HOME}/APDFLX.X.X/Libs
Setting the APDFL library path ( AIX Only )
The APDFL library path for AIX must be added to the LIBPATH variable. The APDFL library path is located in a subdirectory of the APPLIGENT_HOME directory.
The path should be set to ${APPLIGENT_HOME}/APDFLX.X.X/Libs.
Example:
export LIBPATH=${LIBPATH}:${APPLIGENT_HOME}/APDFLX.X.X/Libs
Registration numbers for AppendPDF Pro
In previous versions of AppendPDF Pro, the AppendPDF Pro registration number was required as a command-line option with the -r flag each time appendpdfproapp was run. An appendpdfpro script was provided that automatically added -r and the registration number to the appendpdfproapp command line when the script was run.
In the current release, in addition to getting the registration number from the command line, AppendPDF Pro can get the registration number from a license file in the Appligent home directory. License files are created by the installation script and stored in the ${APPLIGENT_HOME}/license directory. With a valid license file, the -r is no longer required on the command line. The -r option can still be used as in previous versions, and will override the value in the license file.
Parameter Files - XML
Introduction
We will be using the sample parameter file paramsletter.xml in the samples directory as an example throughout this chapter. The default location for AppendPDF Pro on Windows is C:\Appligent\AppendPro\ and AppendPDF is located in C:\Appligent\AppendPDF. On other platforms, it will be wherever you installed it. The paramsletter.xml AppendPDF Pro example contains most of the features described in this chapter for the purpose of explanation and examples.
Note: AppendPDF does not have all the capabilities that are shown in the examples (Comparing AppendPDF Products provides an overview of the differences). Information that is specific to AppendPDF Pro will be followed by the notation: (AppendPDF Pro only).
What is a Parameter File?
AppendPDF and AppendPDF Pro require a parameter file to specify how you want to build a new document. This chapter explains XML parameter files, while Parameter Files — Text (AppendPDF Pro) and Parameter Files — Text (AppendPDF) describe text parameter files:
- XML — the parameter files using XML to code parameter specifications.
- Plain text — the text parameter files used by earlier releases of AppendPDF Pro and AppendPDF. These are supported to maintain backward compatibility with existing workflows. New features will only be available using XML files.
An XML parameter file is a text file containing the XML markup that specifies how AppendPDF Pro or AppendPDF will build your new document. You can specify the name of the output file, list the files to be included in the appended document and set many other options to establish how you want the final document to look when it is opened by the end user.
The parameter file includes:
- <outputpdf> — Output File is the name (including directory path) of the new, appended file.
- <sourcepdfs> — Source Files are the documents to be used for appending, including page ranges and Table of Contents entries.
- <TOC> — Table of Contents information includes the table of contents file, alternate bookmark text, and the stamp file for the table of contents (AppendPDF Pro only).
- <coverpage> — Cover page information includes the cover page file to be used and the stamp file for the cover page (AppendPDF Pro only).
- <docinfo> — Document information is Title, Author, Subject, Keywords, and custom fields. These are viewable within Adobe Acrobat and Acrobat Reader.
- <extras> — Extras specify additional information such as how the document should open or a stamp file for the body of the document.
Building a Parameter File
Elements and structure
We use XML to describe the parameters that AppendPDF Pro and AppendPDF uses to append documents together. As we describe XML elements, there are two sections:
- A tree view of the elements, which describes the elements and shows how they are related.
- Examples of XML code for each element.
Content of an element table
An element table contains the following information:
- Element — The element tag.
- Required — Whether the element is required (
 ) or optional (blank). If the child of an optional element is marked required, it is only required if the parent is used.
 - Content — what information the element contains, i.e., what it specifies. Note that an element can either contain data, or be empty. If it is empty, nothing else is needed.
Note: Empty element tags can be entered using the beginning and end tags together or by using a simpler tag placing the slash “/” after the tag name as shown below:
<tag></tag>
or
<tag/>
The element tree structure
All of the tables in the XML Parameter chapter that describe the structure of elements use notations and indents to indicate specific things about individual elements:
- The element tree structure shows the topmost element as being expanded with child elements below.
- The Level column indicates what level from the top parent element described in the table, the current child element resides.
- The notation “+” indicates the element is collapsed and is a parent which contains child elements within its structure.
- Indents are used to assist in understanding the structure levels of the elements in the table.
- When there are elements that come before the current element in the <appendparam> structure, and they are not being shown, there will be a ⇔ symbol before the element tag name in the table.
- Some parent elements contain several options. When only one of the options can be used at a time the word “OR” will appear before the element tag name in the table.
XML Parameter File Details
The XML parameter file contains content and design information for the document that will be built by AppendPDF Pro or AppendPDF. The following sub-chapters describe in detail how to build parameter files in XML format.
The Top Level Element - XML
Introduction
The element <appendparam> specifies that this is an AppendPDF Pro or AppendPDF parameter file. It has one attribute, version, which should be 1.0. The table below describes the attributes of the element <appendparam>.
Content of the <appendparam> Element
| Element | Level | Pro | Required | Content |
|---|---|---|---|---|
| <appendparam version=”1.0″> | Top |
|
Topmost element, contains entire parameter spec | |
| + <outputpdf> | 2 | The name of the new, appended file | ||
| + <sourcepdfs> | 2 | Input files to be appended | ||
| + <toc> | 2 | |||
| + <coverpage> | 2 | |||
| + <docinfo> | 2 | Document information | ||
| + <extras> | 2 | Modes for opening and displaying files | ||
| 2 | Specify a body Stampfile |
XML Code Sample
<appendparam version="1.0">
     Insert parameter specifications here
</appendparam>
The Output File - XML
Introduction
The element <outputpdf> specifies the output file for the appended document. The following table lists all the elements and their attributes along with the tree view.
The table below describes the elements specifying <outputpdf>.
Contents of the <outputpdf> Element
| Element | Level | Pro | Required | Content |
|---|---|---|---|---|
| <appendparam version=”1.0″> | Top | Topmost element, contains entire parameter spec | ||
| <outputpdf> | 2 | The name of the new, appended file | ||
| <file> | 3 | Text: Name and path of the new, appended file | ||
| + <sourcepdfs> | 2 | Input files to be appended | ||
| + <docinfo> | 2 | Document information |
XML Code Sample
To specify an output file, outputfile.pdf, insert the code:
<appendparam version="1.0">
   <outputpdf>
      <file>
         /fullpath/outputfile.pdf
      </file>
   </outputpdf>
<!-- . Indicates skipped sections -->
<!-- . -->
<!-- . -->
</appendparam>
Element for <outputpdf>
file
Specifies the path and filename of the output, appended PDF file.
The Source Files - XML
Introduction
The element <sourcepdfs> specifies the input files, page ranges, and Table of Contents entry text for the appended document. You can specify more than one input file. To specify multiple page ranges from one file, specify an inputpdf, using the same file, for each page range.
The table below describes the elements specifying <sourcepdfs>.
Contents of the <sourcepdfs> Element
| Element | Level | Pro | Required | Content |
|---|---|---|---|---|
| <appendparam version=”1.0″> | Top | Topmost element, contains entire parameter spec | ||
| <sourcepdfs> | 2 | Input files to be appended | ||
| <inputpdf> | 3 | Input PDF file | ||
| <file> | 4 | Text: Name and path of input file | ||
| <startpage> | 4 | Text: Start page of range to extract | ||
| <endpage> | 4 | Text: End page of range to extract | ||
| <tocentry> | 4 | Text: Table of Contents entry | ||
| + <inputpdf> | 3 | Additional PDF Files |
XML Code Sample
Specifying an input file.
<appendparam version="1.0">
 <!-- .  Indicates skipped sections-->
 <!-- . -->
 <!-- . -->
   <sourcepdfs>
      <inputpdf>
         <file>
            /fullpath/input1.pdf
         </file>
         <startpage>
            3
         </startpage>
         <endpage>
            10
         </endpage>
         <TOCEntry>
            Input File 1
         </TOCEntry>
      </inputpdf>
   </sourcepdfs>
<!-- . -->
<!-- . -->
<!-- . -->
</appendparam>
Elements for <sourcepdfs>
inputpdf
Specifies the details of an input file.
You can specify more than one file by including multiple sets of <inputpdf> tags.
file
Specifies the path and filename of an input PDF file.
startpage, endpage
Specifies the start page and end page of a range of pages to extract and append to the output document. The example above will extract pages 3 through 10 of the input document.
Specifying page ranges
The following notes apply to specifying page ranges:
- If you do not specify a page range, the entire file will be appended.
- You can specify multiple page ranges by specifying the same file in multiple instances of <inputpdf>. For each instance, specify one of the required ranges in a <startpage> and <endpage> set.
- To specify one page, make the value of <startpage> and <endpage> the same.
- To specify from a particular page to the end of the file, use only the <startpage> tag.
- You can specify the last page of a document using -1. This is especially helpful if the number of pages in a document may change.
TOCEntry (AppendPDF Pro only)
Specifies the text to use in the Table of Contents to identify this range of pages. <TOCEntry> is only used if you include a TOC page, see Table of Contents — XML. If you want to append an <inputpdf> without an entry in the Table of Contents, use an empty <TOCEntry> tag as shown below:
<TOCEntry/>
Note: If you are using a TOC page and do not include a <TOCEntry> element for an <inputpdf>, the Title in the Document Properties of the input file will be used as the TOC entry. If the file does not have a Title set, the file name of the <inputpdf> will be used.
Examples
For clarity, the following examples use truncated path names. We recommend that you use full path names for all files. The following examples are from the sample files included with AppendPDF Pro.
Including the entire file
To include the entire file, do not specify a page range:
<sourcepdfs>
   <inputpdf>
      <file>
         ./samples/pdfs/sample1.pdf
      </file>
   </inputpdf>
</sourcepdfs>
To explicitly specify all pages in a file and a TOC entry
<sourcepdfs>
   <inputpdf>
      <file>
         ./samples/pdfs/sample1.pdf
      </file>
      <startpage>
         1
      </startpage>
      <endpage>
         -1
      </endpage>
      <TOCEntry>
         sample document 1
      </TOCEntry>
   </inputpdf>
</sourcepdfs>
Other examples
The following additional examples use a generic example file.
Including one page of a file
To include only page 7 of a file:
<sourcepdfs>
   <inputpdf>
      <file>
         ./samples/example.pdf
      </file>
      <startpage>
         7
      </startpage>
      <endpage>
         7
      </endpage>
      <TOCEntry>
         example document, page 7
      </TOCEntry>
   </inputpdf>
</sourcepdfs>
Including a range to the end of the file
To include from page 7 to the end of the file:
<sourcepdfs>
   <inputpdf>
      <file>
         ./samples/example.pdf
      </file>
      <startpage>
         7
      </startpage>
      <endpage>
         -1
      </endpage>
      <TOCEntry>
         example document, page 7 to end
      </TOCEntry>
   </inputpdf>
</sourcepdfs>
Including the last page only
To specify the last page when you are not sure what number it will be:
<sourcepdfs>
   <inputpdf>
      <file>
         ./samples/example.pdf
      </file>
      <startpage>
         -1
      </startpage>
      <endpage>
         -1
      </endpage>
      <TOCEntry>
         example document, last page
      </TOCEntry>
   </inputpdf>
</sourcepdfs>
Table of Contents - XML
Introduction
The element <TOC> specifies the Table of Contents for the output document. The <TOC> element contains the following elements:
- Setup Information — The PDF source file for the TOC, alternate bookmark text, and an optional stamp file to use on the TOC pages.
- Page Layout — Page Box and margins. See TOC Page Layout Elements — XML.
- Color Space — Grayscale or RGB color. See TOC Color Space — XML.
- Style — Font, text layout, and leader information. See TOC Style Elements — XML.
Setup Information for the <TOC>
The setup information specifies:
- The PDF file AppendPDF Pro uses for the TOC.
- Alternate bookmark text is used to identify the Table of Contents in the bookmark pane if other than “Table of Contents.”
- A stamp file to stamp any optional text or images onto the TOC.
The table below describes the Elements for specifying setup information for <TOC>.
Contents of the <TOC> Element
| Element | Level | Pro | Required | Content |
|---|---|---|---|---|
| <appendparam version=”1.0″> | Top | Topmost element, contains entire parameter spec | ||
| <toc> | 2 | Table of Contents information | ||
| <file> | 3 | Text: Name and path of TOC file | ||
| <bookmarktext> | 3 | Text: Alternate bookmark text | ||
| <stampfile> | 3 | Text: Name and path of stampfile to use |
XML Code Sample
<appendparam version="1.0">
 <!-- . Indicates skipped sections -->
 <!-- . -->
 <!-- . -->
   <TOC>
      <file>
         /fullpath/TOC.pdf
      </file>
      <bookmarktext>
         Alternate bookmark text
      </bookmarktext>
      <stampfile>
         /fullpath/stamptoc.txt
      </stampfile>
 <!-- . -->
 <!-- . -->
 <!-- . -->
   </TOC>
 <!-- . -->
 <!-- . -->
 <!-- . -->
</appendparam>
Elements for setup information of <TOC>
file
Specifies the path and filename of a PDF file to be used for the Table of Contents. AppendPDF Pro will only use the first page of the Table of Contents file. It will add additional copies of the first page as needed.
The file used for the Table of Contents page should not contain any bookmarks. AppendPDF Pro adds its own bookmark.
bookmarktext
Specifies alternate text to appear in the bookmark pane identifying the Table of Contents. The default is “Table of Contents” but you can call it anything you want.
stampfile
Specifies the path and filename of a stamp file specifically for the Table of Contents. Can be used to stamp company information and page numbers, for example, onto Table of Contents pages. Refer to Stamp Files, for more information about stamp files.
Note: Table of Contents pages, Cover pages, and body pages each use an independent stamp file. A <stampfile> listed in the <TOC> section is applied only to the TOC pages and will not affect the cover or the body pages of the output PDF.
Usage notes for the Setup Information elements of <TOC>
All text entered onto the Table of Contents by AppendPDF Pro is linked to the respective pages in the new document.
Example
Specifying alternate bookmark text and a stampfile:
<TOC>
   <file>
      /fullpath/TOC.pdf
   </file>
   <stampfile>
      /fullpath/tocstamp.txt
   </stampfile>
   <bookmarktext>
      TOC Page
   </bookmarktext>
 <!-- . Indicates skipped sections -->
 <!-- . -->
 <!-- . -->
</TOC>
Page Layout Elements - XML
Introduction
The page layout options specify:
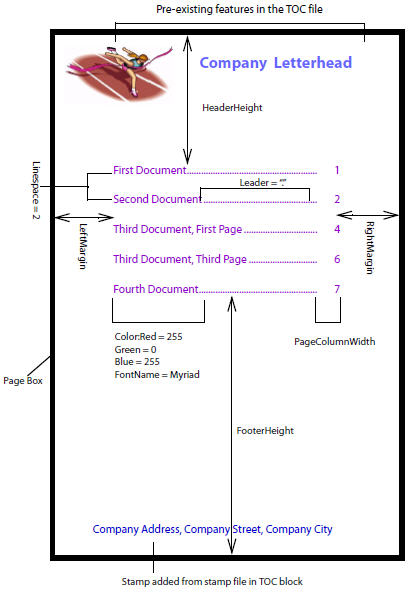
- The <pagebox> is a set of page boundaries that AppendPDF Pro uses when stamping and placing information.
- Header and footer height is measured from the top and bottom margins within the <pagebox>.
- The left and right margins within the <pagebox>.
- The page column width is the width of the column that holds the page numbers.
See the following table for detailed information on the structure of the <TOC> layout.
Contents of the <TOC> Page Layout Element
| Element | Level | Pro | Required | Content |
|---|---|---|---|---|
| <appendparam version=”1.0″> | Top | Topmost element, contains entire parameter spec | ||
| ⇔ <toc> | 2 | Table of contents information | ||
| ⇔ <pagebox> | 3 | Specifies page box | ||
| OR <artbox> | 4 | Empty: page box is art box | ||
| OR <bleedbox> | 4 | Empty: page box is bleed box | ||
| OR <cropbox> | 4 | Empty: page box is crop box [default] | ||
| OR <mediabox> | 4 | Empty: page box is media box | ||
| OR <trimbox> | 4 | Empty: page box is trim box | ||
| <headerheight> | 3 | Text: Specifies header height* [72 pt] | ||
| <footerheight> | 3 | Text: Specifies footer height* [72 pt] | ||
| <leftmargin> | 3 | Text: Specifies left margin* [72 pt] | ||
| <rightmargin> | 3 | Text: Specifies right margin* [72 pt] | ||
| <pagecolumnwidth> | 3 | Text: Specifies page column width* [72 pt] |
* Refer to the Table of Contents: Page layout options explained illustration below for more explanation of these measurements.
XML Code Sample
<appendparam version="1.0">
  <!-- . Indicates skipped sections -->
  <!-- . -->
  <TOC>
    <!-- . -->
    <!-- . -->
    <pagebox>
      <!-- Choose only one of the 5 options -->
      <artbox />
      <bleedbox />
      <cropbox />
      <mediabox />
      <trimbox />
      <!-- End of options -->
    </pagebox>
    <headerheight>84</headerheight>
    <footerheight>60</footerheight>
    <rightmargin>72</rightmargin>
    <leftmargin>72</leftmargin>
    <pagecolumnwidth>60</pagecolumnwidth>
    <!-- . -->
    <!-- . -->
  </TOC>
  <!-- . -->
  <!-- . -->
</appendparam>
Table of Contents: Page layout options explained
Elements for <TOC> page layout
pagebox
Specifies the boundaries that AppendPDF Pro measures from to determine where to place TOC elements.
artbox
Empty element that tells AppendPDF Pro to use the art box as the page box. The art box defines the extent of the page’s meaningful content as intended by the page’s creator.
bleedbox
Empty element that tells AppendPDF Pro to use the bleed box as the page box. The bleed box defines the region where the contents of the page should be clipped when creating output in a production environment. This may include any extra “bleed area” needed to accommodate the physical limitations of cutting, folding, and trimming equipment.
cropbox
Empty element that tells AppendPDF Pro to use the crop box as the page box. The crop box defines the region to which the contents of the page are to be clipped (cropped) when displayed or printed.
mediabox
Empty element that tells AppendPDF Pro to use the media box as the page box. The media box defines the maximum imageable area of the physical medium on which the page is to be printed.
trimbox
Empty element that tells AppendPDF Pro to use the trim box as the page box. The trim box defines the intended dimensions of the finished page after trimming.
Usage notes for <pagebox>
The default is <cropbox>, which will be appropriate for most applications. If the PDF has a crop box set, this will ensure that none of the TOC information you specify will fall outside the viewable area. The most common exception to this is to specify <mediabox>. The other options may be applicable if you have a complex publishing process.
headerheight
Specifies the distance, in points, from the top of the page box to the start of the Table of Contents entries. Default is 72 points (1 inch).
Specifies the distance, in points, from the bottom of the page box to the end of the Table of Contents entries. Default is 72 points (1 inch).
leftmargin
Specifies the left margin, in points. Default is 72 points (1 inch).
rightmargin
Specifies the right margin, in points. Default is 72 points (1 inch).
pagecolumnwidth
Specifies the width of the column that holds the TOC page numbers. Default is 72 points (1 inch). You can use <pagecolumnwidth> to tighten or loosen up the space between the page numbers and the leader. See leader for more information.
Example
Refer to Table of Contents: Page layout options explained above, for an illustration example of the page layout options.
To specify some common settings:
- Default page box.
- One-quarter inch left and right margins.
- 1.4 inch header to leave room for company logo.
- 3 1/3 inch footer to leave room to stamp company address.
- Approximately one-half inch page column width to hold up to 3 digits.
Insert the following code:
<TOC>
 <!-- . Indicates skipped sections -->
 <!-- . -->
 <!-- . -->
   <headerheight>
      100
   </headerheight>
   <footerheight>
      240
   </footerheight>
   <leftmargin>
      18
   </leftmargin>
   <rightmargin>
      18
   </rightmargin>
   <pagecolumnwidth>
      40
   </pagecolumnwidth>
 <!-- . -->
 <!-- . -->
 <!-- . -->
</TOC>
Color Space - XML
Introduction
The <colorspace> option specifies whether the text for the Table of Contents is grayscale or RGB color:
- Grayscale is the gray level specified.
- RGB color is the Red, Green and Blue levels specified to create a color.
The table below describes the elements for the TOC <colorspace>.
Contents of the <colorspace> Element
| Element | Level | Pro | Required | Content |
|---|---|---|---|---|
| <appendparam version=”1.0″> | Top | Topmost element, contains entire parameter spec | ||
| ⇔ <toc> | 2 | Table of contents information | ||
| ⇔ <colorspace> | 3 | Specifies the color space for the TOC | ||
| <devicegray> | 4 | Sets to grayscale | ||
| <color> | 5 | Grayscale level (0–100) | ||
| – – – – – – OR – – – – – – | ||||
| ⇔ <colorspace> | 3 | Specifies the color space for the TOC | ||
| <devicergb> | 4 | Sets to RGB color | ||
| <red> | 5 | Red level (0–255) | ||
| <green> | 5 | Green level (0–255) | ||
| <blue> | 5 | Blue level (0–255) | ||
XML Code Sample
The first example uses <devicegray>, setting <colorspace> to <devicegray> and <color> to 50, which will create medium gray text in the Table of Contents.
<appendparam version="1.0">
 <!-- . Indicates skipped sections -->
 <!-- . -->
 <!-- . -->
   <TOC>
   <!-- . -->
   <!-- . -->
   <!-- . -->
      <colorspace>
         <devicegray>
            <color>
               50
            </color>
         </devicegray>
      </colorspace>
   <!-- . -->
   <!-- . -->
   <!-- . -->
   </TOC>
<!-- . -->
<!-- . -->
<!-- . -->
</appendparam>
The second example uses <devicergb>, setting <colorspace> to <devicergb> and using the values of <red> 51, <green> 153, and <blue> 51, which will create medium green text in the Table of Contents.
<appendparam version="1.0">
 <!-- . Indicates skipped sections -->
 <!-- . -->
 <!-- . -->
   <TOC>
   <!-- . -->
   <!-- . -->
   <!-- . -->
      <colorspace>
         <devicergb>
            <red>
               51
            </red>
            <green>
               153
            </green>
            <blue>
               51
            </blue>
         </devicergb>
      </colorspace>
   <!-- . -->
   <!-- . -->
   <!-- . -->
   </TOC>
<!-- . -->
<!-- . -->
<!-- . -->
</appendparam>
Elements for <colorspace>
devicegray
Specifies the Table of Content entries to be grayscale.
color (required for <devicegray>)
Specifies the gray level of the TOC entries using values from 0 through 100. The <color> value is a percentage of white, such that:
• 0 is black
• 50 is medium gray
• 100 is white
devicergb
Specifies the Table of Content entries to be in RGB color.
red (required for <devicergb>)
Specifies the red level of the TOC entries using values from 0 through 255.
green (required for <devicergb>)
Specifies the green level of the TOC entries using values from 0 through 255.
blue (required for <devicergb>)
Specifies the blue level of the TOC entries using values from 0 through 255.
Usage notes for <red>, <green>, and <blue>
If the color space is <devicergb>, then <red>, <green>, and <blue> specify the levels of each color from 0–255, such that:
| RED | GREEN | BLUE | RESULT |
|---|---|---|---|
| 0 | 0 | 0 | Black |
| 255 | 0 | 0 | Red |
| 0 | 255 | 0 | Green |
| 0 | 0 | 255 | Blue |
| 255 | 255 | 255 | White |
| 128 | 128 | 128 | Gray |
16 million colors are possible with this system. You can get help choosing RGB values from graphic design software or several internet sites (for example, www.visibone.com/colorlab).
Note that red=128, green=128, and blue=128 makes gray. You can duplicate any gray color in RGB with an appropriate choice of equal red, green, and blue values.
Examples
To specify dark gray TOC entries:
   <TOC>
   <!-- . -->
   <!-- . -->
   <!-- . -->
      <colorspace>
         <devicegray>
             <color>
                25
             </color>
         </devicegray>
      </colorspace>
   <!-- . -->
   <!-- . -->
   <!-- . -->
   </TOC>
The following, used in the sample parameter file, paramsletter.xml, results in dark green:
   <TOC>
   <!-- . -->
   <!-- . -->
   <!-- . -->
      <colorspace>
         <devicergb>
            <red>
               0
            </red>
            <green>
               87
            </green>
            <blue>
               44
            </blue>
         </devicergb>
      </colorspace>
   <!-- . -->
   <!-- . -->
   <!-- . -->
   </TOC>
Style Elements - XML
Introduction
The style options specify text style and layout of the text in the TOC. You can specify:
- Font file is the path and name of the PostScript Type 1 font.
- Font name is the name of the font.
- Font size is the size of the font in points.
- The leader character is the character from the end of the TOC entry text to the page number.
- The line spacing.
The table below describes the elements of <TOC> style.
Contents of the <TOC> Style Element
| Element | Level | Pro | Required | Content |
|---|---|---|---|---|
| <appendparam version=”1.0″> | Top | Topmost element, contains entire parameter spec | ||
| ⇔ <toc> | 2 | Table of contents information | ||
| ⇔ <fontfile> | 3 | Text: Name and path of the font file. This is required when specifying a PostScript Type 1 font. | ||
| <fontname> | 3 | Text: Name of the font [Times-Roman] | ||
| <fontsize> | 3 | Text: Size of the font [14] | ||
| <leader> | 3 | Text: Character of the leader | ||
| <linespace> | 3 | Text: Specify the line spacing [3] | ||
| <appendblanklines> | 3 | Empty: Adds additional blank lines after TOC entry — defaults to [3] unless <linespace> is set differently |
XML Code Sample
<appendparam version="1.0">
 <!-- . Indicates skipped sections -->
 <!-- . -->
 <!-- . -->
   <TOC>
   <!-- . -->
   <!-- . -->
   <!-- . -->
      <fontfile>
         /fullpath/HVL_____.pfb
      </fontfile>
      <fontname>
         Helvetica-Light
      </fontname>
      <fontsize>
         12
      </fontsize>
      <leader>
         .
      </leader>
      <linespace>
         4
      </linespace>
      <appendblanklines/>
   <!-- . -->
   <!-- . -->
   <!-- . -->
   </TOC>
Elements for <TOC> style
fontfile
Specifies the name and path of the font file. This is required when specifying a PostScript Type 1 font.
If you specify a PostScript Type 1 font, you must supply the font name (<fontname>), and the path and name of the font file:
- Type 1 fonts use two files, a .pfb and a .pfm file. Both files need to be in the same directory, but you specify the .pfb file for <fontfile>.
- If there is a conflict between font name and font file, the information in the font file overrides the font name.
fontname
Specifies the name of the font for the TOC text. The default is Times-Roman.
There are two types of fonts AppendPDF Pro can use:
- One of the Base 14 fonts
- A PostScript Type 1 font
The names of the Base 14 fonts are:
- Courier, Courier-Bold, Courier-Oblique, Courier-BoldOblique
- Helvetica, Helvetica-Bold, Helvetica-Oblique, Helvetica-BoldOblique
- Times-Roman, Times-Bold, Times-Italic, Times-BoldItalic
- Symbol
- ZapfDingbats
If you use a PostScript Type 1 font, specify the PostScript name of the font. Refer to the font user documentation for the exact spelling of the font name.
You cannot use TrueType or OpenType fonts with AppendPDF Pro. If you use a font other than a Base 14 font, it must be a PostScript Type 1 font.
fontsize
Specifies the size of the font for the TOC text. Fractional point sizes are supported (14.5) The default is 14 points.
leader
Specifies the leader character used in the space from the end of the text to the page number.
Usage note for <leader>
- If you do not specify a leader, long TOC entries will wrap to a new line. Consider this when choosing <linespace> or TOC entries may overlap each other.
- If you have long lines that may wrap, do not specify a leader. Long lines may be truncated with a leader specified.
- You can use <pagecolumnwidth> to tighten or loosen up the space between the page numbers and the leader. See pagecolumnwidth for more information.
linespace
Specifies the line spacing of the TOC text. The default is 3 lines.
Line spacing is specified as:
- 0 = bookmarks are created, but no TOC text is applied to the TOC page.
- 1 = single spacing
- 2 = double spacing
- 3 = triple spacing, and so on…
The default value is 3. Refer to the Usage note for <leader> above for more information.
appendblanklines
Adds blank lines after the last line of the TOC entry, using the value of <linespace>. Without <appendblanklines> set, AppendPDF Pro counts line spaces from the first line of the TOC entry.
For example: When <appendblanklines> is set, if a TOC entry is 3 lines, the line space count will begin after the third line; if the TOC entry is 2 lines, the line space count will begin after the second line of that entry. If <appendblanklines> is not set, the line space count always begins with the first TOC line. See the example below for an illustration.
| <appendblanklines> is not set in the parameter file: | <appendblanklines> is set in the parameter file: |

Use this option to control the spacing between page numbers:
|
Use this option to control the spacing between TOC entries:
|
Examples
Specifying style
To specify the style as shown in the table above.
      <fontname>
         Times-Roman
      </fontname>
      <fontsize>
         14
      </fontsize>
      <leader>
         .
      </leader>
      <linespace>
         3
      </linespace>
To specify the Type 1 Font News Gothic:
      <fontfile>
         /fullpath/NewsGot.pfb
      </fontfile>
      <fontname>
         NewsGothic
      </fontname>
      <fontsize>
         10
      </fontsize>
      <leader>
         -
      </leader>
      <linespace>
         2
      </linespace>
The Cover Page - XML
Introduction
The element <coverpage> specifies a cover page to use on the appended document. You can specify:
- A file to use as the cover page.
- A stampfile for applying stamps to the cover page.
The table below describes the elements of <coverpage>.
Contents of the <coverpage> Element
| Element | Level | Pro | Required | Content |
|---|---|---|---|---|
| <appendparam version=”1.0″> | Top | Topmost element, contains entire parameter spec | ||
| ⇔ <coverpage> | 2 | Cover page information | ||
| <file> | 3 | Text: Specifies name and path of the cover page file | ||
| <stampfile> | 3 | Text: Name and path of the stampfile to use |
XML Code Sample
<appendparam version="1.0">
 <!-- . Indicates skipped sections -->
 <!-- . -->
 <!-- . -->
   <coverpage>
      <file>
         /fullpath/coverpage.pdf
      </file>
      <stampfile>
         /fullpath/stampcover.txt
      </stampfile>
   </coverpage>
 <!-- . -->
 <!-- . -->
 <!-- . -->
 </appendparam>
Elements for <coverpage>
file
Specifies the path and file name of a PDF file to be the cover page. A cover page file can be more than one page. The cover pages should not contain any bookmarks. AppendPDF Pro adds its own bookmark for the cover page.
stampfile
Specifies the path and file name of a stamp file specifically for the cover page. Stamp files can be used to define stamps for customized company information for the cover page. Refer to Stamp Files for more information about stamp files.
Note: Cover pages, Table of Contents pages, and body pages each use an independent stamp file. A <stampfile> listed in the <coverpage> section is applied only to the cover pages and will not affect the TOC or the body pages of the output PDF.
Example
Specifying a cover page and a stamp file
For clarity, the following example does not use full path names. We recommend that you use full path names for all files.
<appendparam version="1.0">
 <!-- . Indicates skipped sections -->
 <!-- . -->
 <!-- . -->
   <coverpage>
      <file>
         ./samples/pdfs/lettersample.pdf
      </file>
      <stampfile>
         ./samples/stampfiles/letterstamp.txt
      </stampfile>
   </coverpage>
 <!-- . -->
 <!-- . -->
 <!-- . -->
 </appendparam>
Document Information - XML
Introduction
The element <docinfo> specifies values for fields Acrobat uses in its document information feature. You can specify values for the following information fields:
- Title
- Subject
- Author
- Keywords
- Custom
The table below describes the elements of <docinfo>.
Contents of the <docinfo> Element
| Element | Level | Required | Content |
|---|---|---|---|
| <appendparam version=”1.0″> | Top | Topmost element, contains entire parameter spec | |
| ⇔ <docinfo> | 2 | Document Information | |
| <infopair> | 3 | Specifies a key-value pair | |
| <key> | 4 | Text: Information field name | |
| <value> | 4 | Text: Information field value |
XML Code Sample
<appendparam version="1.0">
 <!-- . Indicates skipped sections -->
 <!-- . -->
 <!-- . -->
   <docinfo>
      <infopair>
         <key>
             Title
         </key>
         <value>
             Using AppendPDF Pro
         </value>
      </infopair>
   </docinfo>
 <!-- . -->
 <!-- . -->
 <!-- . -->
 </appendparam>
Elements for <docinfo>
infopair
Specifies a key-value pair as described below.
key
Specifies the Document Information field to set:
• Title
• Subject
• Author
• Keywords
• Custom
You can set a single key or any combination of keys.
value
Specifies the value of the Document Information field specified by <key>.
Usage notes for the elements of <docinfo>
Custom fields
- Custom fields can be either strings or dates. These fields will appear in the document information window within Acrobat, and can be searched using Adobe Catalog, or retrieved using Appligent’s APGetInfo utility.
- A string can consist of any name and text value that would add meaningful meta data information to the document.
- A date must be of the format (D:YYYYMMDDHHmmSSOHH’ mm’), where:
YYYY is the year: required
MM is the month (01-12): optional/default = 01
DD is the day (01–X1): optional/default = 01
HH is the hour (00–2X): optional/default = 00
mm is the minute (00–59): optional/default = 00
SS is the second (00–59): optional/default = 00
O is the relationship of local time to Universal Time (UT): optional/default = unknown
+ means local time is later than UT
– means local time is earlier than UT
Z means local time is UT
HH’ is the absolute value of the offset from UT in hours (00–2X)
mm’ is the absolute value of the offset from UT in minutes (00–59)
- Adobe Catalog can perform boolean searches on dates, for example, finding an invoice after 2006 but before 2008.
Example
   <docinfo>

    <infopair>
      <key>Author</key>
      <value>Appligent, Inc.</value>
    </infopair>

    <infopair>
      <key>Title</key>
      <value>AppendPDF Pro Test</value>
    </infopair>

    <infopair>
      <key>Subject</key>
      <value>testing AppendPDF Pro with sample files</value>
    </infopair>

    <infopair>
      <key>Keywords</key>
      <value>testing AppendPDF Pro sample files</value>
    </infopair>

    <infopair>
      <key>ExtraText</key>
      <value>AppendPDF Pro document</value>
    </infopair>

    <infopair>
      <key>DocDate</key>
      <value>D:200707142X2059+04’00’</value>
    </infopair>

  </docinfo>
Extras Elements - XML
Introduction
The element <extras> specifies additional attributes you may want to define for the output file. You can specify:
- Open mode — whether Acrobat will show the navigation pane with bookmarks, thumbnails, or not at all.
- Bookmark mode — how bookmarks will be displayed in the Bookmark pane.
- View mode — the zoom level at which Acrobat opens the document.
- Open to page — the page number to which you want the document to open.
- Stamp file — a stamp file to stamp any optional text or images onto the body of the document. (AppendPDF Pro only)
- Display Mode — the display properties of the Acrobat window when a document is opened.
- Layout mode — The screen layout at which Acrobat will display the document.
The table below describes the elements of <extras>.
Contents of the <extras> Element
| Element | Level | Pro | Required | Content |
|---|---|---|---|---|
| <appendparam version=”1.0″> | Top | Topmost element, contains entire parameter spec | ||
| ⇔ <extras> | 2 | Specifies how a document should open | ||
| <openmode> | 3 | Specifies navigation mode in which file should open | ||
| OR <showbookmarks> | 4 | Empty: Specifies that bookmarks should show | ||
| OR <showthumbnails> | 4 | Empty: Specifies that thumbnails should show | ||
| OR <shownone> | 4 | Empty: Specifies only the document should show | ||
| OR <fullscreen> | 4 | Empty: File opens in full screen mode | ||
| <opentopage> | 3 | Text: Specifies page at which the file should open | ||
| <stampfile> | 3 | |||
| <viewmode> | 3 | Specifies the view that the file should open in | ||
| OR <actualsize> | 4 | Empty: File opens actual size | ||
| OR <fitheight> | 4 | Empty: File opens so window fits full height | ||
| OR <fitpage> | 4 | Empty: File opens so window fits full page | ||
| OR <fitvisible> | 4 | Empty: File opens so visible area fits the window | ||
| OR <fitwidth> | 4 | Empty: File opens to fit full width of window | ||
| <bookmarkmode> | 3 | Specifies the initial state of bookmarks | ||
| OR <openbookmarks> | 4 | Empty: Show all bookmarks | ||
| OR <closebookmarks> | 4 | Empty: Collapse all bookmarks | ||
| OR <openlevel> | 4 | Specifies number of bookmark levels shown | ||
| <layoutmode> | 3 | Specifies the initial display layout mode | ||
| OR <single> | 4 | Empty: One page at a time | ||
| OR <onecolumn> | 4 | Empty: Pages in a continuous vertical column | ||
| OR <twocolleft> | 4 | Empty: Two pages side by side, first page left | ||
| OR <twocolright> | 4 | Empty: Two pages side by side, first page right | ||
| <displaymode> | 3 | Specifies the initial window display mode | ||
| OR <hidetoolbar> | 4 | Empty: File opens with tool bar hidden | ||
| OR <hidemenubar> | 4 | Empty: File opens with menu bar hidden | ||
| OR <hidewinui> | 4 | Empty: File opens without window controls | ||
| OR <fitwin> | 4 | Empty: Window opens resized to fit the first page | ||
| OR <centerwin> | 4 | Empty: Centers document window on screen | ||
| OR <showtitle> | 4 | Empty: Displays document title on title bar |
XML Code Sample
<appendparam version="1.0">
 <!-- . Indicates skipped sections -->
 <!-- . -->
 <!-- . -->
   <extras>
      <stampfile>
         /fullpath/stampfile.txt
      </stampfile>
      <opentopage>
         5
      </opentopage>
      <openmode>
 <!-- Choose only one of the 4 options -->
         <showbookmarks/>
         <showthumbnails/>
         <shownone/>
         <fullscreen/>
      </openmode>
      <bookmarkmode>
 <!-- Choose only one of the 3 options -->
         <openbookmarks/>
         <closebookmarks/>
         <openlevel/>
      </bookmarkmode>
      <viewmode>
 <!-- Choose only one of the 5 options -->
         <actualsize/>
         <fitheight/>
         <fitpage/>
         <fitvisible/>
         <fitwidth/>
      </viewmode>
      <layoutmode>
 <!-- Choose only one of the 4 options -->
         <single/>
         <onecolumn/>
         <twocolleft/>
         <twocolright/>
      </layoutmode>
      <displaymode>
 <!-- Choose one or more of the 6 options -->
         <hidetoolbar/>
         <hidemenubar/>
         <hidewinui/>
         <fitwin/>
         <centerwin/>
         <showtitle/>
      </displaymode>
   </extras>
</appendparam>
Elements of <extras>
opentopage
The page number at which to open the document.
stampfile (AppendPDF Pro only)
Specifies the path and filename of a stamp file for the appended document. These stamps will not be added to the cover page or the Table of Contents.
viewmode
Specifies the zoom level when the document opens.
actualsize
The document opens at actual size.
fitheight
The document opens so the full height of the page fits into the document window.
fitpage
The document opens so the full page fits into the document window.
fitvisible
The document opens so the visible area of the page fits into the document window.
fitwidth
The document opens so the full width of the page fits into the document window.
bookmarkmode
Specifies the initial state of the document’s bookmarks in the navigation pane.
openbookmarks
Expands the bookmark list to show all bookmarks in the navigation pane when the document is opened.
closebookmarks
Collapses the bookmark list to show only the top level bookmarks in the navigation pane when the document is opened.
openlevel
Expands the bookmark list through level n. For example, for n=3, all bookmarks up to and including the third level are shown. The fourth and higher level bookmarks are collapsed.
layoutmode
Specifies the display page layout when the document opens.
single
Displays one page at a time.
onecolumn
Arranges the pages in a continuous vertical column.
twocolleft
Arranges two pages side by side, the first page on the left.
twocolright
Arranges two pages side by side, the first page on the right.
displaymode
Specifies the window display mode when the document opens. You can specify more than one option.
hidetoolbar
Specifies that the Acrobat tool bar will not be displayed when the document opens.
hidemenubar
Specifies that the Acrobat menu bar will not be displayed when the document opens.
hidewinui
Specifies that the Acrobat window controls will not be displayed when the document opens.
fitwin
Resizes the document window to fit the first page when the document opens.
centerwin
Centers the document window on the screen when the document opens.
showtitle
Displays the document title, rather than the file name, on the title bar and the Windows menu.
Usage notes for the elements of <extras>
Cover pages, Table of Contents pages and body pages each use an independent stamp file. Stamps listed in the Extras section are applied only to the body pages, and will not affect the cover or the TOC pages of the output PDF.
Example
The example specifies using extrasstamp.txt as the stampfile; opentopage is page 7; viewmode as fit the full document width to the window; openmode set to show bookmarks and bookmarkmode displaying 3 levels of bookmarks. displaymode will be set to center the window on screen and show the document title in the title bar.
   <extras>
      <stampfile>
         /fullpath/extrasstamp.txt
      </stampfile>
      <opentopage>
         7
      </opentopage>
      <viewmode>
         <fitwidth/>
      </viewmode>
      <openmode>
         <showbookmarks/>
      </openmode>
      <bookmarkmode>
         <openlevel>
            3
         </openlevel>
      </bookmarkmode>
      <displaymode>
         <centerwin/>
         <showtitle/>
      </displaymode>
   </extras
Putting It All Together - XML
Testing your Parameter Files
A parameter file test should be used to make sure all of the documents are being appended in the way that you expect, and the Table of Contents is formatted properly (AppendPDF Pro only). You can use a parameter file with one or two page documents so you can quickly check results and make small adjustments to margins, colors, line spacing, leaders, etc. You can use a source files block that consists of more than one instance of the same one page file for a very simple test. For example:
<appendparam version="1.0">
 <!-- Output file -->
   <outputpdf>
      <file>
         /outputfilepath/output.pdf
      </file>
   </outputpdf>
 <!-- Begin source files -->
   <sourcepdfs>
 <!-- First input file -->
      <inputpdf>
        <file>
           /inputfilepath/Sample1.pdf
        </file>
 <!-- First TOC entry -->
        <TOCEntry>
           Sample A
        </TOCEntry>
        </inputpdf>
 <!-- Second input file -->
        <inputpdf>
          <file>
             /inputfilepath/Sample1.pdf
          </file>
 <!-- Second TOC entry -->
        <TOCEntry>
           Sample B
        </TOCEntry>
        </inputpdf>
 <!-- End of input files -->
   </sourcepdfs>
 <!-- End of source files -->
   <TOC>
     <file>
        /tocfilepath/TOC.pdf
     </file>
   </TOC>
</appendparam>
This will append two /inputfilepath/Sample1.pdf files, each with a different TOC entry, and save the file as /outputfilepath/output.pdf.
Paramsletter Example
The following puts together the examples we’ve been using throughout this section in the file, paramsletter.xml. For clarity, the following example does not use full path names. We recommend that you use full path names for all files.
<appendparam version="1.0">

  <!-- Output File -->
  <outputpdf>
    <!-- Specify output file -->
    <file>./samples/paramsletter_xml.pdf</file>
  </outputpdf>

  <!-- Begin Source PDFs -->
  <sourcepdfs>
    <inputpdf>
      <!-- First input file -->
      <file>./samples/pdfs/sample1.pdf</file>
      <!-- Start at page 1 to end of the file -->
      <startpage>1</startpage>
      <endpage>-1</endpage>
      <!-- TOC entry for file 1 -->
      <TOCEntry>sample document 1</TOCEntry>
    </inputpdf>
    <inputpdf>
      <!-- Second input file -->
      <file>./samples/pdfs/sample2.pdf</file>
      <!-- Start at page 1 to end of the file -->
      <startpage>1</startpage>
      <endpage>-1</endpage>
      <!-- TOC entry for file 2 -->
      <TOCEntry>sample document 2</TOCEntry>
    </inputpdf>
    <inputpdf>
      <!-- Third input file -->
      <file>./samples/pdfs/sample3.pdf</file>
      <!-- Start at page 1 to end of the file -->
      <startpage>1</startpage>
      <endpage>-1</endpage>
      <!-- TOC entry for file 3 -->
      <TOCEntry>sample document 3</TOCEntry>
    </inputpdf>
    <inputpdf>
      <!-- Third input file -->
      <file>./samples/pdfs/sample4.pdf</file>
      <!-- Start at page 1 to end of the file -->
      <startpage>1</startpage>
      <endpage>-1</endpage>
      <!-- TOC entry for file 4 -->
      <TOCEntry>sample document 4</TOCEntry>
    </inputpdf>
  </sourcepdfs>
  <!-- End source PDFs -->

  <!-- Begin Cover Page Block -->
  <coverpage>
    <!-- Coverpage template -->
    <file>./samples/pdfs/lettersample.pdf</file>
    <!-- Stamp file for cover page -->
    <stampfile>./samples/stampfiles/letterstamp.txt</stampfile>
  </coverpage>
  <!-- End Cover Page Block -->

  <!-- Begin TOC Block -->
  <TOC>
    <!-- TOC template file -->
    <file>/samples/pdfs/toc.pdf</file>
    <!-- Stampfile for TOC -->
    <stampfile>./samples/stampfiles/tocstamp.txt</stampfile>
    <!-- Alternate bookmark text for TOC -->
    <bookmarktext>TOC Page</bookmarktext>
    <!-- 1.4 inches header down to beginning of TOC entries -->
    <headerheight>100</headerheight>
    <!-- 3 1/3 inches footer up to bottom of TOC entries -->
    <footerheight>240</footerheight>
    <!-- Left margin 1/4 inch -->
    <leftmargin>20</leftmargin>
    <!-- Right margin 1/4 inch -->
    <rightmargin>20</rightmargin>
    <!-- Helvetica font for TOC entries -->
    <fontname>Helvetica</fontname>
    <!-- Font size for TOC entries is 14 pt -->
    <fontsize>14</fontsize>
    <colorspace>
      <!-- Colorspace RGB -->
      <devicergb>
        <!-- RGB color is 0, 87, 44 - Dark Green -->
        <red>0</red>
        <green>87</green>
        <blue>44</blue>
      </devicergb>
    </colorspace>
    <!-- Triple spaced text -->
    <linespace>3</linespace>
    <!-- Add additional 3 lines after TOC entries -->
    <appendblanklines />
    <!-- Leader looks like this ......... -->
    <leader>.</leader>
    <!-- Width of column for TOC page numbers: about 1/2 inch -->
    <pagecolumnwidth>40</pagecolumnwidth>
  </TOC>
  <!-- End of the TOC -->

  <!-- Begin Info Block -->
  <docinfo>
    <!-- Specify Author as "Appligent, Inc" -->
    <infopair>
      <key>Author</key>
      <value>Appligent, Inc.</value>
    </infopair>
    <!-- Specify Title as "AppendPDF Pro Test" -->
    <infopair>
      <key>Title</key>
      <value>AppendPDF Pro Test</value>
    </infopair>
    <!-- Specify Subject as "testing AppendPDF Pro with sample files" -->
    <infopair>
      <key>Subject</key>
      <value>testing AppendPDF Pro with sample files</value>
    </infopair>
    <!-- Specify the following Keywords: testing AppendPDF Pro appending assembly -->
    <infopair>
      <key>Keywords</key>
      <value>testing AppendPDF Pro sample files</value>
    </infopair>
    <!-- Specify a custom info field of ExtraText as "AppendPDF Pro document" -->
    <infopair>
      <key>ExtraText</key>
      <value>AppendPDF Pro document</value>
    </infopair>
    <!-- Specify custom info field of DocDate -->
    <!-- as the date "July 14, 2007,11:20:56 pm" -->
    <!-- Local time 4 hours later than Universal time -->
    <infopair>
      <key>DocDate</key>
      <value>D:20000714235659</value>
    </infopair>
  </docinfo>
  <!-- End of Docinfo -->

  <!-- Begin Extras Block -->
  <extras>
  <!-- Zoom to fit the page when document is opened -->
    <viewmode>
      <fitpage />
    </viewmode>
    <!-- Show bookmarks in the navigation pane when the document is opened -->
    <openmode>
      <showbookmarks />
    </openmode>
  </extras>
  <!-- End of Extras information-->

</appendparam>
<!-- End of parameter file-->
Parameter Files - Text
Introduction
We will be using the sample parameter file, paramsletter.txt, in the samples directory as an example throughout this chapter. The default location for AppendPDF on Windows is C:\Appligent\AppendPDF\ and AppendPDF Pro is located in C:\Appligent\AppendPro. On other platforms, it will be wherever you installed it. The paramsletter.txt example, (AppendPDF Pro only), contains most of the features described in these chapters for the purpose of explanation and examples.
Note: AppendPDF does not have all the capabilities that are shown in the examples. Parameters that are specific to AppendPDF Pro will be followed by the notation: (AppendPDF Pro only).
What is a Parameter file?
To run AppendPDF Pro or AppendPDF you will need a parameter file. A text parameter file is a simple text file that contains the instructions AppendPDF Pro or AppendPDF uses to build your new document. Sample parameter files are included with the AppendPDF Pro and AppendPDF installation and are located in the samples directory.
A parameter file includes:
- The name and directory path of the new, appended PDF file
- Source file information is a list of the documents to be used for appending, including page ranges and Table of Contents (TOC) entries (AppendPDF Pro only)
- Cover page information includes the cover page file and the stamp file for the cover page (AppendPDF Pro only)
- Table of Contents information includes the TOC file, style information, and the stamp file for the TOC (AppendPDF Pro only)
- Document Info is Title, Author, Subject, Keywords which are viewable within Adobe Acrobat and Acrobat Reader
- Extras specify additional information such as how the document should open and a stamp file for the body of the document (AppendPDF Pro only)
Important! We will continue to support existing text parameter files. However, new features will only be available using XML files.
Building a Text Parameter File
New file name
The first line of the parameter file is the name of the new PDF file — the output file that will be created by AppendPDF or AppendPDF Pro. For example:
paramsletter.pdf
It is likely that you will be appending files that do not reside in the directory that holds AppendPDF or AppendPDF Pro. To avoid losing track of where your files are being written, we recommend that you include the full pathname for each file that you use. For example:
C:\MyDir\WorkFiles\paramsletter.pdf
Parameter file details
The following sub-chapters describe in detail how to build the rest of the parameter file in text format.
Important! We will continue to support existing text parameter files. However, new features will only be available using XML parameter files.
- The Source Files Block — Text
- The Document Information Block — Text
- Putting It All Together — Text
The Source Files Block - Text
Introduction
The Source Files Block is required. Following the first line of the parameter file is the list of input or source files that AppendPDF Pro or AppendPDF will use to create the new document. Before beginning the list you must enter the keyword begin_source and at the end of the list insert the keyword end_source. Files will be appended in the order that they appear in the source files list. After each filename are commas and page numbers; this is the notation that AppendPDF Pro and AppendPDF uses for specifying pages and page ranges. Specifying pages is discussed in detail below.
This is an example source file block:
begin_source
Sample1.pdf
Sample2.pdf,1,2
Sample3.pdf,1,1
Sample3.pdf,3,3
Sample4.pdf,2,4
end_source
It is important to make sure that none of your source files have names with commas in them. Since AppendPDF Pro and AppendPDF uses commas for describing page ranges, it will try to interpret any comma it sees as being a part of page information. Each parameter file can have only one source files block. Extra source blocks will be ignored.
Specifying page ranges in your source files block
In AppendPDF and AppendPDF Pro page ranges are delimited by commas. In the source files block shown above, each file has a range of pages specified. The different ways for specifying which pages you want to use are described below. When specifying pages do not insert spaces between file names and commas, or commas and numbers.
- If no pages are specified with a file, all pages from that file will be appended to the new document. For example:
Sample1.pdf
- To specify a single page to append from a file, after the file name add a comma, the page number to be appended, another comma and the same page number. This indicates that the beginning and ending page are the same, as in Sample3.pdf below:
Sample3.pdf,1,1
- To specify a range of pages place a comma after the file name, the number of the first page in the range, another comma, and the last page number of the range. The following example of Sample4.pdf specifies the range of pages 2 through 4:
Sample4.pdf,2,4
- To specify multiple, non-contiguous pages from a single document, multiple entries need to be made in the parameter file. Below, see that Sample3.pdf is listed twice, once to add page 1 and a second time to add page 3:
Sample3.pdf,1,1
Sample3.pdf,3,3
Note: This is the only way to avoid appending page 2 for this file.
- To specify all pages from a specific page in a document, list the starting page only. Appending will start from this page and go to the end of the document. The sample below will append pages 2 through the end of Sample3.pdf:
Sample3.pdf,2
- To specify that only the last page of a document be appended, use the special notation -1 as shown with Sample2.pdf below:
Sample2.pdf,-1
Note: The -1 notation for last page can be used with page ranges. As shown in the example below, the second through the last page of sample4.pdf will be appended:
sample4.pdf,2,-1
Note: If you will be including a Table of Contents, you must explicitly specify what pages in the document are to be appended - even if all pages of a document are to be used. The TOC will not recognize any files that are listed without a page range.
The Cover Page Block - Text
Introduction
The optional cover page is a PDF document that is appended at the beginning of the final appended output. There are two approaches to cover pages:
- Supply your own ready-made cover page
- Supply a document and specify a stamp file that AppendPDF Pro will use to stamp information onto the page
Cover pages are allowed to be more than one page. Cover pages should not contain any bookmarks. AppendPDF Pro adds its own bookmark for the cover page.
Cover Page
To supply a ready-made PDF document for the cover page named lettersample.pdf, add the following information to your parameter file:
begin_coverpage
CoverPage (./samples/pdfs/lettersample.pdf)
end_coverpage
The name of the document that will be the cover page needs to be entered in parentheses after the keyword CoverPage. The Cover Page block of the parameter file must begin with begin_coverpage and end with end_coverpage.
There must be at least one space between the CoverPage keyword and the name of the cover page filename in parentheses. We recommend that you always use the full path to the PDF document used as the cover page.
Stamped Cover Page
Using a stamp file with your cover page will provide more flexibility in design. See Stamp Files to learn how to create a stamp file that will place custom text, watermarks, or page numbers on your cover page. When your stamp file is ready, include the file with the full path, in your cover page block, along with the name of the document to be used for the cover page:
begin_coverpage
CoverPage (./samples/pdfs/lettersample.pdf)
StampFile (./samples/stampfiles/letterstamp.txt)
end_coverpage
Your cover page will be stamped with information you specified in CoverStamp.txt.
The Table of Contents Block - Text
Introduction
The optional Table of Contents (or TOC) works similarly to the Cover Page. The user provides a blank PDF document to be used for the Table of Contents. AppendPDF Pro uses this to write the chapter headings and page numbers. The TOC block in the parameter file can specify a stamp file as in the Cover Page block. The user is able to specify how information is printed on the Table of Contents page(s): in what font, size, position and color. All text entered by AppendPDF Pro on the Table of Contents page is linked to the respective pages in the new PDF document.
The document used for the Table of Contents page must be a single-page document. If the Table of Contents needs to run on to a second or more pages, a copy will be made of the first page to accommodate the additional listings. Do not have any bookmarks in the document you use for your Table of Contents. AppendPDF Pro applies its own bookmark for these pages.
A sample Table of Contents block looks like this:
begin_TOC
TOCPage         (./samples/pdfs/toc.pdf)
StampFile       (./samples/stampfiles/tocstamp.txt)
BookMarkText    (TOC Page)
HeaderHeight    (100)
FooterHeight    (240)
LeftMargin      (20)
RightMargin     (20)
FontName        (Helvetica)
FontSize        (14)
ColorSpace      (DeviceRGB)
Red             (0)
Blue            (44)
Green           (87)
LineSpace       (3)
Leader          (.)
PageColumnWidth (40)
end_TOC
Parameter Descriptions
TOCPage (required)
TOCPage must be specified or no Table of Contents will be generated. You should supply the full path to the PDF file you wish to use for the TOC page. The file name must be enclosed in parenthesis.
StampFile (optional)
If you would like to stamp additional information such as a watermark, copyright etc. on your Table of Contents, you may use the stamp file for this. Always use the full path to the StampFile. The stamp file name must be enclosed in parenthesis.
Note: The StampFile listed in the TOC block does not control any options for the TOC entries. These must be included in the TOC block of the parameter file.
The rest of the TOC block closely resembles the construction of a stamp item as you’ll see in the section on Stamp Files. The following sections will explain the remaining components of the TOC block.
HeaderHeight, FooterHeight, LeftMargin and RightMargin are values given in points that you can use to position your Table of Contents listing to appear as you want. AppendPDF Pro will use a default of 72 points (1 inch) if the margin parameters are omitted. The unit for the margins is points; use the conversion of 72 points to the inch to determine how you would like your margins to appear.
FontName and FontSize (optional)
FontName and FontSize are optional parameters. If you do not include these your Table of Contents will be done in the default font, Times-Roman, and the default size of 14 pt.
The FontName is the name of a Base 14 font (sometimes called a system font). With any font that you use, make sure that you enter the name of the font properly, with the correct spelling, hyphenation and capitalization.
The names of the Base 14 fonts are:
- Courier, Courier-Bold, Courier-Oblique, Courier-BoldOblique
- Helvetica, Helvetica-Bold, Helvetica-Oblique, Helvetica-BoldOblique
- Times-Roman, Times-Bold, Times-Italic, Times-BoldItalic
- Symbol
- ZapfDingbats
FontFile (optional)
If you would like to use a font other than a Base 14 font, it is possible to use an additional parameter, FontFile, to add a PostScript Type 1 font. To use one of these fonts you will need to give the font’s name in FontName and the location of the font’s .pfb file in FontFile.
Fonts consist of two files: one with a .pfm extension and one with a .pfb extension. Both of these files need to be in the same directory for AppendPDF Pro to access the font properly but only the .pfb file is listed in the parameter file. The PostScript name of the font will need to be entered in FontName. More information on fonts and font files is presented in the section on Stamp Files, Font Specifications.
If there is a conflict between FontName and FontFile, the information in FontFile overrides that in FontName.
Note: You cannot use TrueType or OpenType fonts with AppendPDF Pro. If you use a font other than a Base 14 font, it must be a PostScript Type 1 font.
ColorSpace (optional)
ColorSpace should be either DeviceGray or DeviceRGB. Use DeviceRGB if you will be using color values and DeviceGray if you will be using a shade of gray.
DeviceGray works in conjunction with the Color keyword.
DeviceRGB works in conjunction with the Red, Green and Blue keywords. In AppendPDF Pro, you can specify the color of the TOC text by setting the Red, Green and Blue values, allowing you to use virtually any color you like. See the section on Stamp Files, Stamp Color for more details on choosing colors.
ColorSpace is an optional parameter. If you omit it, TOC entries will be written in black (DeviceGray and Color of 0).
Color (optional)
If you choose ColorSpace to be DeviceGray, use the Color keyword to specify the shade of gray to be used. Color is measured as a percentage of white within black — a value between 0 and 100 where 0 is black and 100 is white. A Color of 95, therefore would be a very light gray, and a Color of 15 would be a dark gray.
Red, Green and Blue (required with ColorSpace – DeviceRGB)
Red, Green and Blue can each be any value from 0 to 255, depending on how much of each color you need to create your desired color. More on colors can be found in the section on Stamp Files, Stamp Color.
LineSpace (optional)
LineSpace allows you to make some modification to the space that appears between each entry on the Table of Contents page. If you do not use the LineSpace parameter, AppendPDF Pro will use the default of 3. LineSpace can be any number as long as it is an integer. The number corresponds to the number of carriage returns between entries.
Leader (optional)
Leader will place a leading character (a dot, for example) from the end of the text of the Table of Contents entry to the page number for that entry. A leader will help your reader join the TOC entry to its page number. The most common leader character is a dot (.), but you are free to use any other ASCII character (+, *, -, _, etc.)
Note: If a Leader is not specified, long TOC entries will wrap to a new line. Consider this when choosing LineSpace or TOC entries may overlap each other. If a Leader is specified, lines will not wrap in the TOC entries and long lines will be truncated.
PageColumnWidth (optional)
PageColumnWidth specifies the width of the column for page numbers in the TOC listing. The width is defined in points and can be modified to increase or decrease the space between the page numbers and the leader characters. If PageColumnWidth is not used, a width of 72 points is used as the default. Make sure the column is set wide enough to enclose the largest page number a TOC entry will have, however, for aesthetic reasons we suggest not using columns larger than 75 points.
How to Change a Source Files Block to Make a Table of Contents
If you will be including a Table of Contents with your appended file you need to specify both the first and last page to be used in the document, then add a TOC entry at the end of each line in your source files block. This will be the heading used on the TOC page. For instance:
begin_source
sample1.pdf,1,-1,(sample document 1)
sample2.pdf,1,-1,(sample document 2)
sample3.pdf,1,-1,(sample document 3)
sample4.pdf,1,-1,(sample document 4)
end_source
The above example is a source files block that will make entries in a Table of Contents if there is a TOC block in the parameter file. The text in parentheses will be used on the TOC page. There should be no spaces between items on the source files block line. It is fine to have spaces within the TOC entry text, as shown above.
After the page numbers are specified, insert another comma to separate page numbers from the TOC entry text, then add the text in parentheses. With the block specified as shown in the example above, the result will look something like this:
sample document 1
sample document 2
sample document 3
sample document 4
You may vary the appearance by choosing different fonts, point sizes, leaders, colors and line spacings.
All of the entries will be active links to their respective pages.
Note: When using TOC entries in your source files block, take care with how you use the -1 notation to indicate “last page.” In a plain source files block (without TOC entries) it is possible to enter sample1.pdf,-1 and the last page will be appended. In the TOC entry the notation must be modified slightly and -1 must be added twice (a source file must always have the beginning and end pages specified when a TOC entry is to be used):
sample1.pdf,-1,-1,(A "last page" TOC entry)
Inserting All Pages in a Document and Making a TOC Entry
The pages of a document must be clearly stated for the Table of Contents to recognize it and add it to the Table of Contents page. If you would like all pages from your document to be in the appended document you will need to tell AppendPDF Pro to insert all pages from page 1 to the last page:
sample1.pdf,1,-1,(All pages appended)
If you know that the particular document has 50 pages you could tell AppendPDF Pro to insert pages 1 to 50, that will also append all the pages of the document:
filename.pdf,1,50,(All pages appended)
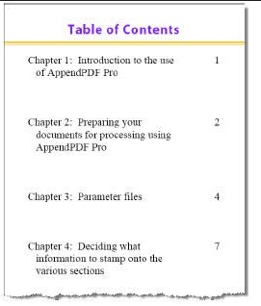
Example of a Finished Table of Contents Page
The figure below explains the Table of Contents page layout options.
The Document Information Block - Text
Introduction
The Document Information Block is optional. Within Adobe Acrobat there is a feature to view information about a file by choosing Document Properties from the File menu. With AppendPDF Pro and AppendPDF it is possible to populate certain fields of the Document Info with the parameter file. A sample of a Document Properties dialog screen from Acrobat is shown below.
Document Info screen
Below is a Document Info screen in Acrobat for a Sample PDF, also called Document Properties.
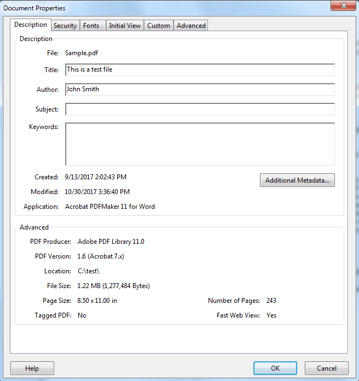
Title, Author, Subject, and Keywords are fields in the Document Info screen as shown in the figure above. These are the fields that can be modified by AppendPDF Pro and AppendPDF. Enter values in the parameter file as you would like to see them appear when you call up the Document Properties in Acrobat. The fields Title, Subject and Author refer to information specific to that document. Keywords (this is Acrobat’s Keywords, not to be confused with the many other references to keywords in this manual) are usually simple words used for sorting and grouping (December, ProjectX, personal, etc.) and are useful for those who will be indexing their documents with Acrobat Catalog and would like to improve searching efficiency. More about indexing can be found in the Acrobat Guide or the Reader Guide if you don’t have the full version of Acrobat. (Either guide can be found under the Help menu of its respective application.)
To specify document information in a parameter file, list the name of the field followed by its value in parentheses. Before beginning this section the keyword begin_info must be added to the parameter file. At the end of the list close the section with the end_infokeyword:
begin_info
Title (AppendPDF Pro Test)
Subject (testing AppendPDF Pro with sample files)
Author (Appligent, Inc.)
Keywords (testing AppendPDF Pro sample files)
end_info
There is no set number of tabs or spaces that need to appear between the field name and the value in parentheses, as long as there is at least one tab or space. Also, if you do not want to include a Document Info field (for example, if you want Title and Subject, but not Author and Keywords) make sure that keyword is not listed in the Document Info block. Items listed with empty parentheses will cause AppendPDF or AppendPDF Pro to fail.
Make sure that all Document Info keywords (Title, Subject, Author, Keywords) are spelled correctly or AppendPDF and AppendPDF Pro will treat them as custom strings. Custom strings are discussed in the next section.
Optional Custom Information to Add within Document Info
AppendPDF and AppendPDF Pro support two custom field types: strings and dates. These can be added within the Document Info block of the AppendPDF or AppendPDF Pro parameter file which saves them in the keywords section of the Document Properties. The keywords can then be indexed with Acrobat Catalog.
The name of a custom string can be anything you want. Give it any name that will have meaning to you and/or be easy for you to remember. For example:
String1 (This file created by AppendPDF Pro)
or
ExtraText (AppendPDF Pro document)
Custom dates need to conform to the format D:YYYYMMDDHHMMSS. Acrobat Catalog allows dates to be searched using boolean operators. You can tell Catalog to find, for example, invoices whose date is greater than 1999 and less than 2000. A custom date in the Document Info block of the parameter file can be entered as:
DocDate (D:20170714235659)
This example indicates a date of 14 July 2017 with a time of 23:56:59.
The Extras Block - Text
Overview
The optional Extras block is used to apply stamps to the body of an appended document. You can add a watermark, company logo, page numbers etc. Extras stamps will not be applied to Cover or Table of Contents pages. One stamp file can be used in the Extras block. There is no limit to the number of stamp items in the file. Stamp Files provides full instructions for creating stamp files.
Cover pages, Table of Contents pages, and appended pages each use an independent stamp file. Stamps listed in the Extras block are to be applied solely to the appended pages of the output PDF and will not affect the cover or TOC pages.
Example
The Extras block in your parameter file is constructed as follows:
begin_extras
StampFile (./samples/stampfiles/ExtraStamps.txt)
end_extras
As with the other parts of the parameter file (except for the Source Files Block) make sure there is at least one space or tab separating the keyword StampFile from the value in parentheses. The extras block must begin with begin_extras and end with end_extras.
Putting It All Together - Text
Adding Comments
Comments in your parameter file are lines of text that you don’t want to be read by AppendPDF Pro or AppendPDF. They can be either notes to yourself or descriptions of what something does or is used for, which can be useful if others will be accessing the file. Additionally, comments can be used for testing or debugging. You may want to prevent a file from being used in the source list, instead of deleting and retyping the name of the file you can simply “comment it out”. Comments start with the hash or number symbol: # and must be placed at the beginning of a line:
#This is a comment in my parameter file.
The following is an incorrect comment:
begin_source #beginning of the file list
Note: AppendPDF Pro or AppendPDF reads the first line of a parameter file as the name to call the new, appended document. Therefore, if a comment is on the first line of a parameter file and is not preceded by a #, AppendPDF Pro or AppendPDF will think it is the name for the output file. There will be no error messages generated during processing and the output file name will be the text of the comment and it will be written to the AppendPDF Pro or AppendPDF directory. The file will not have a .pdf extension. Remember the # before all comments.
Complete Parameter File Example
Now that we have gone through all of the pieces of a parameter file, we show one in its entirety. This example is almost the same as the sample paramscomplete.txt parameter file that comes with your copy of AppendPDF Pro. The example below uses all the parameter options.
Note: AppendPDF does not support all of the options in this example, however there are two example files located in the Samples directory where you installed AppendPDF. They are parameters.txt and tutorial.txt.
#Complete Parameter file for use with AppendPDF Pro with a cover letter
#Name for the new, appended file
./samples/paramsletter.pdf
#List of files and pages for appending with text for Table of Contents
begin_source
./samples/pdfs/sample1.pdf,1,-1,(sample document 1)
./samples/pdfs/sample2.pdf,1,-1,(sample document 2)
./samples/pdfs/sample3.pdf,1,-1,(sample document 3)
./samples/pdfs/sample4.pdf,1,-1,(sample document 4)
end_source
#Cover page block
begin_coverpage
CoverPage (./samples/pdfs/lettersample.pdf)
StampFile (./samples/stampfiles/letterstamp.txt)
end_coverpage
#Table of Contents block
begin_TOC
TOCPage (./samples/pdfs/toc.pdf)
StampFile (./samples/stampfiles/tocstamp.txt)
BookMarkText (TOC Page)
HeaderHeight (100)
FooterHeight (240)
LeftMargin (20)
RightMargin (20)
FontName (Helvetica)
FontSize (14)
ColorSpace (DeviceRGB)
Red (0)
Blue (44)
Green (87)
LineSpace (3)
Leader (.)
PageColumnWidth (40)
end_TOC
#document info block
begin_info
Title (AppendPDF Pro Test)
Subject (testing AppendPDF Pro with sample files)
Author (Appligent, Inc.)
Keywords (testing AppendPDF Pro sample files)
ExtraText (AppendPDF Pro document)
DocDate (D:20170714235659)
end_info
#Extras block for Stamp Files
begin_extras
Open_Mode (ShowBookmarks)
View_Mode (FitPage)
end_extras
#End of parameter file
The parameter file is a text document which requires the new file name and the list of documents to append. The document information is optional. The Cover page, TOC, and Extras blocks are also optional and used only with AppendPDF Pro.
When this example file is run with AppendPDF Pro, the user will get an output file called appendprocomplete.pdf that contains all of the pages listed in the Source files block of the parameter file.
When File > Document Properties or File > Properties is selected in Acrobat, the Title, Subject, Author, and Keywords fields will be populated with the information as shown in the Document Info block of the sample parameter file. A custom string and date have been added for searching with Acrobat Catalog.
The pages of the appended documents (not the cover or the table of contents) will be stamped by the stamp file listed in the Extras block.
Stamp Files
We will be using the sample stamp file letterstamp.txt in the samples directory as an example throughout this chapter. The default location for AppendPDF Pro on Windows is C:\Appligent\AppendPro\. On other platforms, it will be wherever you installed it.
Important! This chapter applies to AppendPDF Pro only. AppendPDF does not have the capability to stamp files.
What is a Stamp File?
A stamp file is a text file that specifies how AppendPDF Pro will apply stamps to your document. A stamp file has two main components:
- an options block placed at the beginning of the stamp file, containing the version of the stamp file, and specifies general stamp properties. Each line in the options block describes properties for the entire PDF document being stamped.
- one or more stamp items that contain the parameters to describe a particular stamp. Each stamp has its own stamp item and a stamp file can have an unlimited number of stamp items.
Options block overview
The options block specifies properties for the entire file. It consists of the following sections:
- Label — specifies the version of the stamp file.
- Positioning — specifies the default stamp margins for the entire PDF file.
- Acrobat options — specifies how Acrobat handles the document when opened.
Stamp items
Each stamp file can specify many stamps. The parameters for an individual stamp are contained in a stamp item. AppendPDF Pro supports these types of stamps:
- Text stamps — you specify the text to stamp onto the document.
- Unicode text stamps — you specify Asian characters to stamp onto the document.
- Image stamps — you specify an image to stamp onto the document.
- PDF stamps — PDF files are placed into your document.
- Barcode stamps using a Code 128 barcode font.
All types of stamps use pagination, positioning and general parameters. Other parameters are unique to each type of stamp. Stamp items begin with the keyword Begin_Message and end with the keyword End_Message. In the following sections we will explain all the stamp item parameters, create stamp items for text stamps and create stamp items for image stamps.
Parameters
Each stamp item is described by a parameter/value pair. Enter parameters as follows:
Parameter (value)
For example:
Position (Top)
stamps the item on the top of the page.
Comments
You can insert comments where you need them to make the file more readable, or you can comment out sections for debugging purposes. Comments start with the hash or number symbol (#) which must be placed at the beginning of a line:
# This is a correct comment
Below is an incorrect comment:
Begin_Message #beginning of the file list
Creating the Stamp File's Options Block
Introduction
The options block specifies properties for the entire file. It consists of three sections: Label, Positioning, and Viewer Options.
Options block
| Type | Parameter | Required | Default | Content |
|---|---|---|---|---|
| Begin | Begin_Options | Beginning of option block | ||
| Label | Version | Version of stamp file: 2 | ||
| Positioning | TopMargin | 12 | Top margin of page in points | |
| BottomMargin | 12 | Bottom margin of page in points | ||
| LeftMargin | 8 | Left margin of page in points | ||
| RightMargin | 8 | Right margin of page in points | ||
| Viewer Options | ViewMode | Unchanged | Zoom level the file should open in | |
| OpenMode | Unchanged | Navigation mode the file should open in | ||
| End | End_Options | End of option block |
Options block parameters — detailed description
The options block begins with the Begin_Options and ends with the End_Options keywords. Each stamp file has only one options block. For example, the options block in letterstamp.txt looks like this:
| Begin_Options | Begin Options block |
| Version (2) | Stamp file format version 2 |
| TopMargin (36) | Top margin 36 points (1/2 inch) |
| BottomMargin (36) | Bottom margin 36 points (1/2 inch) |
| LeftMargin (36) | Left margin 36 points (1/2 inch) |
| RightMargin (36) | Right margin 36 points (1/2 inch) |
| End_Options | End Options block |
Label parameter
Provides labeling information for the stamp file.
Version (required)
The stamp file format version. The Version parameter must be in the options block for the software to work. This version of AppendPDF Pro uses version 2.
Positioning parameters
Specifies the default page boundary margins of the file, the area where stamping can occur. See Page boundary margins vs. stamp margins below for more information on how these margins affect stamp placement.
TopMargin (optional)
The amount of space, in points, from the top of the document to the stamping area.
Default value: 12 points.
BottomMargin (optional)
The amount of space, in points, from the bottom of the document to the stamping area.
Default value: 12 points.
LeftMargin (optional)
The amount of space, in points, from the left side of the document to the stamping area.
Default value: 8 points
RightMargin (optional)
The amount of space in points from the right side of the document to the stamping area.
Default value: 8 points.
Page boundary margins vs. stamp margins
When you specify the positioning parameters for a stamp item, you will override the page boundary margins defined in the options block for that stamp item.
In the figure below, the margins are 36 points, one half inch. The centered, diagonal stamp is centered between all four margins. The top stamp begins at the left margin and the bottom stamp ends at the right margin. Margins in the options block differ from rectangle margins for a stamp item. See Positioning parameters above for more information.
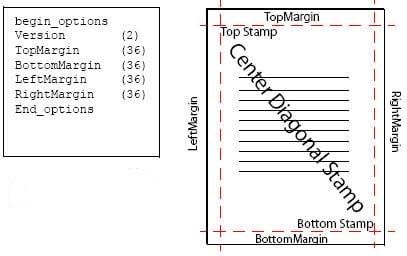
Converting inches to points
Margins are specified in points. One inch is equivalent to 72 points. The table below can help with conversions:
| Inches | Points |
|---|---|
| 0.11 | 8 |
| 0.167 | 12 |
| 0.5 | 36 |
| 0.75 | 54 |
| 1.0 | 72 |
| 1.5 | 108 |
| 2.0 | 144 |
An 8 1/2 x 11 inch page is 612 x 792 points.
Viewer option parameters
Specifies the default view and navigation modes for the file.
ViewMode (optional)
The default document zoom level. Possible values are:
- ActualSize
- FitHeight, full page height fits into the document window
- FitPage, full page fits into the document window
- FitVisible, visible page area fits into the document window
- FitWidth, full page width fits into the document window
If the ViewMode is not specified, the document retains its original setting.
OpenMode (optional)
The default navigation mode. Possible values are:
- ShowBookMarks, file bookmarks are displayed in the navigation pane
- ShowThumbNails, page thumbnails are displayed in the navigation pane
- ShowNone, the navigation pane is not displayed
If OpenMode is not specified, the document retains its original setting.
Creating Stamp Items for Text Stamps
Introduction
A stamp item begins with the Begin_Message and ends with the End_Message keywords. Each stamp file can have many stamp items. Each text stamp item uses various parameters for the text item. Each parameter will be described in detail below.
The table below summarizes all the parameters available for stamp items.
| Type | Parameter | Text | Image | Default | Comments |
|---|---|---|---|---|---|
| Begin | Begin_Message | Start of stamp item | |||
| Label | Name | Name for stamp | |||
| UndoLabel | Permits the later removal of a stamp | ||||
| Type | Required: Specifies type of stamp | ||||
| Pagination | StartPage | 1 | Start page for stamp | ||
| EndPage | -1 | End page for stamp | |||
| PageIncrement | 1 | How many pages to skip between stamps | |||
| PageRange | all | Which individual pages to stamp | |||
| Positioning | Top, Right | From options block | Margins for stamp. Overrides margins of the page boundaries set in the options block for the stamp item. | ||
| Bottom, Left | |||||
| Position | Top | Position and orientation on page | |||
| Justification | Center | Left, right or center | |||
| Angle | 0 | Angle to rotate text stamp | |||
| Underlay | No | Above (no) or beneath (yes) existing text/images | |||
| PageBox | cropbox | Sets which set of page boundaries are used to position the stamp | |||
| OffsetX | Horizontal placement offset | ||||
| OffsetY | Vertical placement offset | ||||
| Text Options | Size | 12 | Font size in points | ||
| Font | Helvetica-Bold | Name of font | |||
| FontFile | Location of font file, if necessary | ||||
| TextMode | 0 | Mode: solid (0), outline (1) or invisible (3) | |||
| Text | Text to stamp | ||||
| WordWrap | No | Insert line breaks to fit text within margins | |||
| CharSpace, WordSpace | 0 | Change spacing between characters and words | |||
| LineSpace | 1 | Change spacing between lines | |||
| ColorSpace | DeviceGray | DeviceGray, DeviceRGB or Device CMYK | |||
| Gray | 0 | DeviceGray: Gray level (0–100) | |||
| Red,Green,Blue | 0,0,0, | DeviceRGB: RGB color values (0–255) | |||
| Cyan,Magenta,Yellow,Black | 1,1,1,1 | DeviceCMYK: CMYK color values (0–1) | |||
| BatesDigit | 0 | Number of digits in Bates number | |||
| Opacity | 1 | Transparency of text; 0–1 | |||
| Image Options | Path | Location of image file | |||
| Scale | Specify size of image | ||||
| PageNumber | The page of a PDF to be stamped, only Type (PDF) | ||||
| End | End_Message | End of stamp |
Stamp parameters — detailed description
A stamp item begins with the Begin_Message and ends with the End_Message keywords. Each stamp file can have many stamp items. Each parameter will be described in detail below.
Label parameters
Name (optional)
Name identifies the stamp item. The Name parameter will help you keep track of many stamp items in one stamp file.
UndoLabel (optional)
UndoLabel allows you to remove the stamp later. UndoLabel can be any character string, such as:
UndoLabel (undostamp)
Avoid using the characters \ / : * ? ” < > | ^ and &. These characters cause problems when used on the command line. The UndoLabel is case sensitive.
Note: AppendPDF Pro 5.5 has the ability to remove stamps.
A stamp created with an UndoLabel can be removed via the command line using the -u option. However, you must run AppendPDF Pro with a parameter file when removing stamps.
appendpro –u undostamp ParamFile.txt
After running this command, any stamp that has the UndoLabel of “undostamp” in its stamp item will be removed from the document. Many stamps can have the same UndoLabel in their stamp item; they will all be removed at the same time. For example, if you would like to have all stamps removed with one command, use the same UndoLabel for all of them.
If a stamp item does not have an UndoLabel specified in the stamp file, you will not be able to remove it later. So if you are not sure, it’s always good to specify an UndoLabel and keep a record.
Note: Remember the name of your UndoLabel. There is nothing in the stamped document to indicate the name of a stamp item’s undo label. If you forget the undo label, and do not have the original stamp file to look it up, using the -u option is not possible. Also remember that undo labels are case sensitive. If you save the document from Acrobat using the “Save As” command, the undo labels will be lost.
Type (required)
The type of stamp you will be making. Text stamps can be plain text or Unicode. Image stamps can be JPEG, TIFF or PDF. Specify Barcode to stamp barcodes.
Specify the type of stamp using the following:
- Type (Text) for stamping plain text into your document
- Type (UTF8) for stamping UTF-8 Unicode characters into your document
- Type (UTF16) for stamping UTF-16 Unicode characters into your document
- Type (Barcode) for stamping code 128 barcodes
- Type (Image) for stamping JPEG or TIFF images onto your documents
- Type (PDF) for stamping PDF images onto your documents
For more information about Unicode stamps, see Using Unicode. For more information on stamping images or PDF files, see Creating Stamp Items for Image Stamps. For more information on stamping barcodes, see Stamping Barcodes.
Pagination parameters
StartPage (optional)
StartPage specifies the first page to be stamped. Enter any page number or use -1 which is a shorthand notation for the last page. If you would like stamping to begin on the second page, enter 2 for StartPage. If you would like stamping to begin on the fifth page, enter 5 for StartPage. StartPage is optional; if StartPage is omitted, stamping will begin on page 1.
EndPage (optional)
EndPage specifies the last page to be stamped. For example, if you have a stamp that you need applied only to pages 2 through 10, use StartPage (2) and EndPage (10).
If you wish to stamp to the end of the document, then EndPage can be set to (-1). The (-1) is a notation for the last page of the document.
EndPage is optional; if EndPage is omitted, stamping will continue to the end of the file.
PageIncrement (optional)
PageIncrement specifies the increment to place stamps, i.e., on every other page, every fifth page, every tenth page, etc. For example, a PageIncrement of…
- 1 stamps every page
- 2 stamps every other page
- 5 stamps every fifth page
Page increments begin with the StartPage you specified. You can coordinate these parameters to stamp even pages, odd pages, or other increments of pages that you choose.
PageIncrement is optional; if PageIncrement is omitted, every page between StartPage and EndPage will be stamped.
The following table shows how the StartPage and PageIncrement parameters can be used together for stamping selected pages in a document:
| StartPage | PageIncrement | stamps pages |
|---|---|---|
| 1 | 1 | 1,2,3,4,5,etc. |
| 1 | 2 | 1,3,5,7,9,etc. |
| 2 | 2 | 2,4,6,8,10,etc. |
| 1 | 5 | 1,6,11,16,21,etc. |
| 5 | 5 | 5,10,15,20,25,etc. |
You can apply different stamps on alternating pages, for example, to have the footer on even pages to be left-aligned, and on odd pages, right-aligned. You need two separate stamp items to achieve this: one with the left-aligned formatting and one with the right-aligned formatting. See the example below.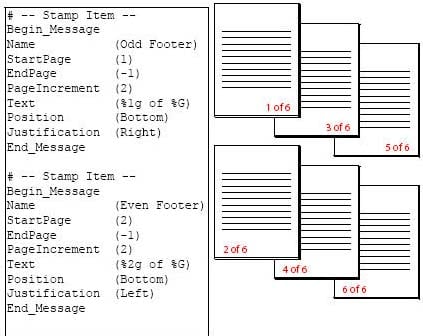
PageRange (optional)
PageRange lets you specify individual pages to stamp. PageRange overrides any range specified by StartPage, EndPage, and PageIncrement. To specify individual pages to stamp, list them separated by commas:
PageRange (1,3,6,8)
will stamp pages 1, 3, 6 and 8.
Note: If PageRange, StartPage, EndPage and PageIncrement are omitted, every page will be stamped.
Positioning parameters
Top, Bottom, Left, and Right (optional)
Top, Bottom, Left and Right parameters specify margins for the stamp item that override the page boundary margins set in the options block. These parameters define a rectangle in which to place a stamp. The Position and Justification parameters work relative to this new rectangle, rather than the margins set in the options block for that stamp item. See the figures below:

|
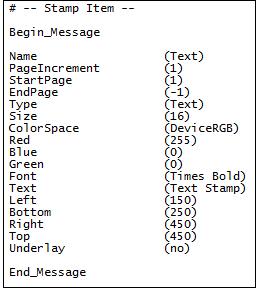
|
If you do not want to modify all of the margins, only set the ones you want changed. If you leave out one of the parameters, that margin remains as set in the options block.
Note: Setting rectangle margins using Top, Bottom, Left, and Right differs from setting margins in the options block. In the options block, margins are set as the amount of space from the page edge to the margin. In the rectangles specified within a stamp item, all measurements are made from the lower left corner of the page.
Top, Bottom, Left and Right are optional; if any are omitted, the corresponding value from the options block will define the margin.
Position (optional)
Position specifies where on the page the stamp item will appear. Position is optional. If Position is omitted, the stamp will be applied to the top. The figure below illustrates how various positions for stamps appear on pages. Allowed values are:
- Top, stamps text horizontally across the top of the page
- Diag-BottomLeft, stamps text diagonally across the page beginning at the bottom left margin
- Diag-TopLeft, stamps text diagonally across the page beginning at the top left margin
- Bottom, stamps text horizontally across the bottom of the page
- VCenter, stamps text at the precise vertical center of the document, as defined by the margin settings. Horizontal positioning must still be defined by other parameters
- Angle, used with the Angle parameter described below, which will stamp text at any angle. Position must be set to Angle for the Angle parameter to work.
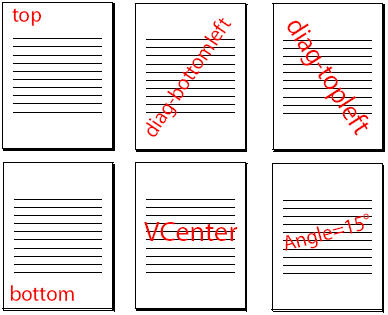
Justification (optional)
Justification specifies text alignment on document pages. Justification is optional. If Justification is omitted, the text will be centered. The figure below illustrates how stamps display on pages using various values. Possible values are:
- Left, aligns text with the left margin of the document.
- Right, aligns text with the right margin of the document.
- Center, horizontally centers text between the left and right margins. Diagonal text stamps that use centering will also be centered vertically in the space between the top and bottom margins.

Use this parameter with Position, described above, to create accurate placement of your stamp.
Angle (optional)
Angle specifies an angle for stamp positioning, in degrees. Angle is optional. If Angle is omitted, text will be stamped horizontally. While a diagonal stamp will angle text on the page diagonal, the Angle parameter can position a text stamp at any angle. In order for the Angle parameter to be read, the Position parameter described above must be set to Angle.
The pivot point for an angle is defined by the Bottom and Left parameters. Justification for Angle is always Left. Any other value set for Justification will be ignored. Angle takes as its input any positive or negative number. Fractional angles are allowed (for example, 37.5).
Underlay (optional)
Underlay specifies whether to stamp under, or on top of, existing text and graphics of the input PDF document. The figure below illustrates how stamps will appear on pages. Underlay is optional. If Underlay is omitted, text will be stamped over existing text and graphics. The options are:
- Yes, stamps text underneath the PDF document text and graphics.
- No, stamps text on top of the PDF document text and graphics.

Notes on using the Underlay option
Set Underlay to Yes to prevent covering the original PDF content. Other options for not obscuring original text are outline text, TextMode (1) or transparent text, Opacity (0.5).
- If the color of the text you stamp is the same color as the text in the document, your stamp will obscure the document text. To avoid this, specify gray or a different color to make the stamp stand out from the overlaid text.
- Underlaid text stamped on PDF documents that are scanned as image files will not be visible. For these types of documents use an overlaid stamp, set Underlay to No.
- Some PDF files contain hidden text and images. Underlaid text will not be visible under hidden images. If you encounter this, overlay the stamped text, and use outline text, TextMode (1) or transparent text, Opacity (0.5).
- Under some circumstances, the combination of the printer driver and the application used to create the PDF document will create a white rectangle behind the PDF text. An underlying stamp will be hidden by the body of the PDF text and images. If you encounter this situation, create an overlay text stamp, and use outline text, TextMode (1) or transparent text, Opacity (0.5).
PageBox (optional)
This parameter sets which set of page boundaries are used to position the stamp. The options available for the PageBox parameter are mediabox, cropbox, artbox, trimbox and bleedbox. If the document you are stamping is cropped, set the PageBox parameter to cropbox.
Default value: cropbox
OffsetX (optional)
The OffsetX parameter allows you to specify a precise horizontal offset for a stamp item. The value of the offset is given in points, and can be positive or negative. A positive value of OffsetX will move the stamp to the right; a negative value will move the stamp to the left.
If you have a left-justified stamp with OffsetX set to 36 and LeftMargin set to 60, the image would be stamped 96 points from the left edge of the document: 60 points for the LeftMargin plus 36 points for the X offset.
OffsetX (36)
If you have a left-justified stamp with OffsetX set to -36 and LeftMargin set to 60, the image would be stamped 24 points from the left edge of the document: 60 points for the LeftMargin plus -36 points for the X offset.
OffsetX (-36)
OffsetY (optional)
The OffsetY parameter allows you to specify a precise vertical offset for a stamp item. The value of the offset is given in points and can be positive or negative. A positive value of OffsetY will move the stamp up; a negative value will move the stamp down. If you have a bottom-positioned stamp with OffsetY set to 20 and BottomMargin set to 72, the image would be stamped 92 points from the bottom edge of the document: 72 points for the BottomMargin plus 20 points for the Y offset.
OffsetY (20)
If you have a bottom-positioned stamp with OffsetY set to -20 and BottomMargin set to 72, the image would be stamped 52 points from the bottom edge of the document: 72 points for the BottomMargin plus -20 points for the Y offset.
OffsetY (-20)
Using a combination of OffsetX and OffsetY with Position and Justification parameters lets you place text and images very precisely in the document. See the figure below for examples of using these parameters.
As an example, a text stamp can be placed with a negative number of points to the left of the right margin of the stamp item when Justification has been set to Right. See Position (optional) and Justification (optional) for more detailed information.
| #Options | Comment – Beginning of Stamp file |
| Begin_Options | Begin Options |
| Version (2) | Version Number |
| TopMargin (0) | Page – Top Margin |
| BottomMargin (0) | Page – Bottom Margin |
| LeftMargin (0) | Page – Left Margin |
| RightMargin (0) | Page – Right Margin |
| End_Options | End Options |
| # — Stamp Item — | Comment |
| Begin_Message | Begin Stamp Item |
| Name (Top Left) | Named Top Left |
| PageIncrement (1) | Stamp every page |
| StartPage (1) | Start on first page |
| EndPage (-1) | Stamp to the last page |
| Type (Image) | Image stamp |
| Path (./appligent_logo.jpg) | Path to image to be stamped |
| Position (top) | Position stamp at top |
| Justification (left) | Left justify |
| Underlay (no) | Place it over existing text and graphics |
| OffsetX (36) | X axis Offset |
| OffsetY (-36) | Y axis Offset |
| End_Message | End stamp item |
The figure below shows the upper left hand corner of a file stamped with the stamp item parameters from the figure above. The page margins are all set to 0; without the offsets, both the text and image would be placed on the top-left edge of the page.
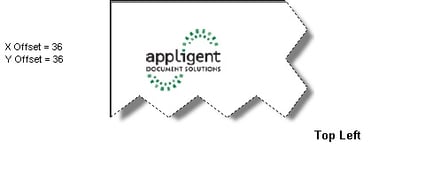
Text Options parameters
Size (optional)
Size specifies the point size of the font that you are stamping. Fractional point sizes are allowed, for example, 11.5. Size is optional. If you omit this option, text will be stamped 12 points. To help decide on a point size for your text stamp, most text you read is 10 or 12 points. Newspaper text, for example, is usually 10 points. Business letters are commonly done in 12 points.
To create a watermark that fills a whole letter-sized page diagonally, select a large point size: “Confidential” stamped in 128 points fills an 8 1/2 x11 inch page diagonally.
Font (optional)
Font specifies the name of the font to use. Font is optional. If Font is omitted, stamping will be done in Helvetica Bold.
There are two types of fonts AppendPDF Pro can use:
- One of the base 14 fonts
- An Adobe Postscript Type 1 font
Metrics for the base 14 fonts are included with AppendPDF Pro. The names of the base 14 fonts are:
| Courier | Helvetica | Times Roman |
| Courier-Bold | Helvetica-Bold | Times Bold |
| Courier-Oblique | Helvetica-Oblique | Times Italic |
| Courier-BoldOblique | Helvetica-BoldOblique | Times Bold Italic |
| Zapf Dingbats | Symbol |
If you use an Adobe Type 1 font, specify the PostScript name of the font. Refer to the documentation that came with the font.
Some names of common Adobe PostScript Type 1 fonts are New Century Schoolbook and News Gothic. You will need to check your own system to see what fonts are available to you.
FontFile (optional)
If you specify an Adobe Type 1 font, you must supply the path and name of the font file. Fonts use two files, a .pfb and a .pfm file. Both files need to be in the same directory, but you specify the .pfb file.
Notes on fonts
AppendPDF Pro also supports the use of barcode fonts and OCR fonts (Optical Character Recognition) for use with scanning documents. Use these fonts in the same way as any other Postscript Type 1 font. Enter the font’s PostScript name in the Font parameter and enter the name and location of the font’s .pfb file in the FontFile parameter.
With any font that you use, make sure that you enter the name of the font properly, with the correct spelling, hyphenation and capitalization. All PostScript Type 1 fonts must have their PostScript name given for the Font parameter. For example, the PostScript name for New Century Schoolbook is NewCenturySchlbk-Roman, for News Gothic is NewsGothic, etc.
Note: You cannot use TrueType or OpenType fonts with AppendPDF Pro. If you use a font other than a system or Standard font, it must be a PostScript Type 1 font.
PostScript Type 1 fonts may be purchased from Linotype’s website.
Notes on using the same font more than once
If you use a PostScript Type 1 font more than once in your stamp file, the FontFile parameter is only required the first time. Subsequent stamp items only need the Font name.
Note: If the FontFile is used more than once in the stamp file, font information will be added multiple times in the stamped document. This may result in unexpectedly large documents. You can run with the -optimize flag to reduce the file size of the stamped PDF.
You can only use one font per stamp. However, if you would like to use two (or more) fonts and have them appear as the same stamp, make a separate stamp item for each font. For each item use the same position for the stamp, but insert spaces (not tabs) in the Text parameter of each stamp as placeholders for the characters in the other stamp so the two items do not overlap. For example, to create a stamp that has both Helvetica and Symbol characters, have one item stamping Helvetica and one stamping Symbol. The Font and Text parameters are:
Item 1:
Font (Helvetica)
Text (The circumference of a circle is 2    r.)
Item 2:
Font (Symbol)
OffsetX (176)
Text (                                   p)
The resulting stamp will look like this:
The circumference of a circle is 2πr.
TextMode (optional)
TextMode specifies stamp text as an outline, solid, or invisible. TextMode is optional; if TextMode is omitted, text will be solid. TextMode has three options:
- 0 stamps text as solid characters.
- 1 stamps text as outlined characters.
- 3 stamps invisible text.
The figure below illustrates the use of the TextMode parameter values.
Invisible text can be a useful aid for searching through a document. Acrobat’s Text Tool can highlight invisible text, showing its location in a PDF document. However, you won’t be able to see the text and it will not appear in the printed document.
Text (required)
Text specifies the content of the stamp. Type text exactly as you want it to appear. The figure below illustrates using the Text parameter.
With the Text parameter you can use variables to stamp dynamic information, such as the date and time of stamping or page numbers in a variety of formats. See Using variables in stamp files for more information.
WordWrap (optional)
WordWrap specifies whether long lines of text should wrap. WordWrap is optional. If WordWrap is omitted, any lines too long will be cut off. There are two possible values for WordWrap:
- Yes, if a line of text is too long to fit between the margins specified, it will continue on subsequent lines.
- No, if a line of text is too long to fit between the margins specified, it will be cut off at the edge of the margin.
Note: Word wrapping only works for ASCII text. If you are stamping CJK fonts using Unicode, use the MultiLine parameter and manually insert line breaks to make multiple line stamps. Refer to Multi-Line UTF8/UTF16 Stamps for information on inserting line breaks.
CharSpace and WordSpace (optional)
CharSpace adjusts character spacing and WordSpace adjusts word spacing. Enter a positive real number with up to three digits following the decimal point. A positive value (greater than 0) will increase the spacing; a negative value (less than 0) will decrease the spacing. Default value is 0, no change in spacing.
LineSpace (optional)
LineSpace adjusts line spacing for multiple lines. Enter a positive real number with up to three digits following the decimal point. A value between 0 and 1 will decrease the line spacing; a value greater than 1 will increase the line spacing. LineSpace (2) will stamp multiple lines as doublespace.
Default value is 1, no change in linespacing.
BatesDigit (optional)
BatesDigit is used to specify the number of Bates digits for a stamp item containing a Bates stamp variable (%J or %C). If BatesDigit is set to 3, page 2 will be stamped as 002, a BatesDigit of 5 will stamp 00002. See Using Bates notation for page numbering for information about Bates numbering.
ColorSpace (optional)
ColorSpace specifies the text as grayscale or color. ColorSpace is optional; if ColorSpace is omitted, stamping will be done in DeviceGray. Specify the color of the stamp as follows:
- DeviceGray, a shade of gray. Use the Color parameter to specify the level of gray.
- DeviceRGB, a combination of Red, Green, and Blue values. Use the Red, Green, and Blue parameters to specify the color. This is common for on-line viewing.
- DeviceCMYK, a combination of Cyan, Magenta, Yellow, and Black values. Use the Cyan, Magenta, Yellow, and Black parameters to specify the color. This is common for print documents.
ColorSpace does not specify the color, only the type of color. You need to specify the color as described below.
Gray used with ColorSpace (DeviceGray) (optional)
Use Gray if your ColorSpace is DeviceGray. Gray is optional. If Gray is omitted, the stamped text will be black. Gray specifies a shade of gray, use a value between 0 and 100, where 0 is black and 100 is white. A Gray of 95 is a very light gray, and a Gray of 15 is a dark gray.
Gray (15)
The Color parameter used in previous versions of AppendPDF Pro is supported for backward compatibility.
Red, Green, and Blue used with ColorSpace (DeviceRGB) (optional)
Use Red, Green, and Blue if your ColorSpace is DeviceRGB. Red, Green, and Blue are optional. If they are omitted, the text will be stamped black. The values for these colors can be in the range of 0–255, where 0 represents none of the color and 255 represents 100% of the color. You can combine varying amounts of the three color components to generate virtually any color. Here are some examples:
To create a purple stamp enter the following values for the color components:
Red (102)
Green (51)
Blue (204)
To create a green stamp enter:
Red (0)
Green (150)
Blue (0)
By not specifying the full 255 of green, a value of 150 will generate a lighter shade of green.
You must include values for each color: Red, Green, and Blue. Use a setting of 0 for colors you do not want.
Cyan, Magenta, Yellow, and Black used with ColorSpace (DeviceCMYK) (optional)
Use Cyan, Magenta, Yellow, and Black if your ColorSpace is DeviceCMYK. Cyan, Magenta, Yellow, and Black are optional. If they are omitted, the text will be stamped black. The values for these colors can be in the range of 0–1, where 0 represents none of the color and 1 represents 100% of the color. You can combine varying amounts of the four color components to generate virtually any color. Here are some basic examples:
To create the same color purple stamp enter the following values for the color components:
Cyan (0.63)
Magenta (0.76)
Yellow (0)
Black (0)
To create a yellow stamp enter:
Cyan (0)
Magenta (0)
Yellow (0.5)
Black (0)
By not specifying the full 1 of Yellow, a value of 0.5 will generate a lighter shade of yellow.
You must include values for each color: Cyan, Magenta, Yellow, and Black. Use a setting of 0 for colors you do not want.
Notes on Color: RGB vs. CMYK
If you’re not familiar with color spaces, you may be confused by the differences in the way colors are specified in RGB or CMYK.
RGB is a color space for televisions and computer monitors. Color is created by mixing red, green, and blue light. The maximum values result in white light. Since computer monitors are digital, RGB levels are specified in a four-bit word, from 0 to 255.
CMYK is a color space for printing. Color is created by mixing cyan, magenta, yellow, and black inks. The maximum values result in black ink. Ink levels are specified in percentages, from 0 to 1.
Notes on Color: How to select colors using RGB or CMYK components
Online, Visibone Webmaster’s Color Lab have tools to help you select a color. When you select a color that you like, the code for that color is given in RGB (Red, Green, Blue), CMYK (Cyan, Magenta, Yellow, and Black), and/or hexadecimal (used in HTML for web pages). Copy the RGB or CMYK values given and enter them into the corresponding parameters in the stamp file. You may also have software already installed on your computer that will help you design colors by accepting different values for color and displaying the results.
The values for RGB must be integers in the range 0–255. If you find colors defined as percentages, convert them to the 0–255 range. For example, 25% Red is 0.25 × 255 = 64. The values for CMYK must be in the range 0–1. If you find the colors defined as percentages, convert to decimal equivalent. For example 52% Cyan is 0.52.
Opacity (optional)
Opacity specifies the transparency of the text. Values range from 0 to 1, where 0 is completely transparent (invisible) and 1 is completely opaque. Opacity allows you to place a stamp over existing text or graphics without completely obscuring the original. As an example, for a watermark that says “Draft” or “Confidential” and is a medium transparency use the following line in the stamp item:
Opacity (0.3)
A sample text stamp
The figure below shows the stamp item in letterstamp.txt to place a watermark looks like this:
| # — Stamp Item — | Comment |
| Begin_Message | Begin Stamp Item |
| Name (Watermark) | Named Watermark |
| Type (Text) | Text stamp |
| StartPage (1) | Start on page 1 |
| EndPage (-1) | Stamp to the last page |
| PageIncrement (1) | Stamp every page |
| Position (diag-topleft) | Position diagonally from the top left corner |
| Justification (center) | Center it both vertically and horizontally on the page |
| Underlay (yes) | Place it underneath existing text and graphics |
| Size (84) | Text size is 84 points |
| Font (Courier Bold) | Font is Courier Bold |
| TextMode (1) | Text will be an outline |
| Text (Confidential) | Text says “Confidential” |
| WordWrap (no) | Do not wrap to a new line |
| ColorSpace (Gray) | Color of stamped text |
| Color (50) | Medium shade of gray |
| End_Message | End Stamp Item |
Using Unicode
Introduction
AppendPDF Pro can use Unicode Asian characters in the Text parameter to stamp Asian language characters. The stamp Type must be set to UTF8 or UTF16, and the font set to one of 7 predefined Asian fonts. If the stamp will be on more than one line, the MultiLine parameter must also be set. The only place double-byte characters can be used is in the Text parameter.
Prerequisites for Acrobat full version
In order to use Acrobat to view and print Asian text, you must have Asian language support files installed for both the Operating System (OS) and Acrobat. The table below shows whether Asian font support is automatically installed for your combination of OS and Acrobat, or whether you have to manually install it.
Unicode Font Support for Windows and Mac OS X and Acrobat.
| OS | Font Support | |||
|---|---|---|---|---|
| Version | Automatic | Manual | ||
| OS | Windows | 7 & higher |
|
|
| Mac | OS X | |||
| Acrobat | Windows | 7 & higher | ||
| Mac OS X | 10.0 and higher | |||
Operating System
Asian font support is automatically installed for all OS platforms except Windows 2000/NT. To install Asian font support, open Regional Options in the Control Panel, and add the fonts you want. You may need your original installation disk. Refer to the Windows on-line help for more information. You can also install keyboard support.
Acrobat
Asian font support is automatically installed only in Acrobat 6 under Mac OS X. For all other versions, you will need to do a custom installation, and choose to install Asian font support. Refer to the Acrobat on-line help for more information.
Prerequisites for Adobe Reader®
In order to use Adobe Reader to view and print Asian text, you must install the Asian Font Pack from Adobe Systems.
Windows/UNIX
Download and install the Asian Font Pack.
Reader components can be updated in a variety of ways. Some updates are available when you open a PDF that triggers the updating process automatically. For example, if you open a form that uses Asian language fonts, Reader asks whether you want to download the fonts. Other updates are available only from the Help menu, and you must install them manually. Some updates are available both automatically and manually.
Mac OS X
You cannot download the Asian Font Pack for Mac OS X. You must choose to install it when you install Acrobat Reader. If you did not, you must reinstall Reader.
Available fonts
The table below lists the seven fonts that are available for double-byte character stamping:
| Font Name in AppendPDF Pro | Font Name in Acrobat |
|---|---|
| HeiseiKakuGo-W5 | Heisei Kakugo |
| HeiseiMin-W3 | Heisei Mincho |
| HYGoThic-Medium | HYGoThic Medium |
| HYSMyeongJo-Medium | HYSMyeongJo Medium |
| MHei-Medium | MHei-Medium |
| MSung-Light | MSung Light |
| STSong-Light | STSong Light |
Use the font name in the left-hand column above in the Font parameter in your stamp file.
Character encoding
Stamp files can be encoded as Plain Text (ISO-8859 or ISO Latin 1) or as UTF-8. If you are going to use Asian characters, we recommend using UTF-8 stamp files and a text editor that supports UTF-8.
Type UTF8
Enter the Asian characters directly into the Text parameter.
Only the Text parameter can have Asian fonts or any other higher level Unicode character. All other text in the file must use only the Latin character set (the first 128 characters, equivalent to “ASCII”). For example:
Type (UTF8)
Font (HeiseiMin-W3)
Text
Note: UTF-8 encoded characters are converted to UTF-16 before stamping into the document. UTF-16 characters are stamped directly into the document with no intervention by AppendPDF Pro. If you want to make sure your characters are stamped directly with no conversion, use UTF-16.
Type UTF16
Enter double-byte characters in big-endian hexadecimal. Each character is represented by four hex digits. Enter the entire Text parameter as a string of hex codes with no breaks or prefixes.
For example, to enter the three characters 5185 5BC6 306E, enter:
Type (UTF16)
Font (HeiseiKakuGo-W5)
Text (51855BC6306E)
Refer to Resources for help finding codes.
Multi-line UTF8/UTF16 stamps
In order to get multi-line text stamps, you must set the MultiLine parameter to yes. AppendPDF Pro will not check for line separator characters if the MultiLine parameter is set to no. Use the following codes for the line separator:
For UTF8, use \r as a line separator character. Place \r directly into the text where you want the new line to start. For example:
Type (UTF8)
Font (HeiseiMin-W3)
MultiLine (yes)
Text
For UTF16, place the Unicode line separator character 2028 in your text string where you want the new line to start. For example:
Type (UTF16)
Font (HeiseiKakuGo-W5)
MultiLine (yes)
Text (51855BC6306E202851855BC6306E)
Both Text parameters result in this stamp:

Resources
- The Unicode Consortium has the complete Unicode specification, providing a wealth of information on Unicode, character sets, and conversions.
- SC UniPad provides a free trial of UniPad, a Windows-based Unicode text editor.
- IT and communication provides an extensive tutorial on character sets, including Unicode.
Stamping Barcodes
Introduction
AppendPDF Pro can stamp barcodes using a Type 1 barcode font, or directly using the Barcode Type. For more information on stamping with Type 1 fonts see Font (optional).
Specify stamping a barcode by setting the Type parameter to Barcode:
Type (Barcode)
AppendPDF Pro only supports Code 128 barcodes, additional codes will be added in future releases.
Barcode parameters
Code
Specifies the barcode type. Use instead of Font and FontFile. AppendPDF Pro currently supports Code 128. Use:
Code (128)
to specify a Code 128 barcode.
AppendPDF Pro uses Code 128 character set B. A simple Code 128 barcode (i.e., one character set) consists of a start character, the coded data, a calculated symbol check character, and an end character. AppendPDF Pro Batch automatically calculates the check character and places the start, check, and stop characters in the appropriate place. You only need to specify the data.
Size
Specifies the size of the barcode in points. 72 points equals one inch, so to meet UCC requirements of a minimum of 0.5 inch, specify 36 points
Default value: 12 points
Scale (optional)
The Scale parameter increases or decreases the size of the barcode when it is stamped onto the PDF document. A scale of 0.5 will make the image half (50%) of its original size, while a scale of 2 (200%) will double it.
Example
The figure below shows a stamp item that stamps a plain barcode at the bottom of the page.
| # — Barcode Item — | Comment |
| Begin_Message | Begin Stamp Item |
| Name (BarcodeTest) | Named BarcodeTest |
| Type (Barcode) | Barcode stamp |
| StartPage (1) | Start on first page |
| EndPage (1) | Stamp only first page |
| Position (Bottom) | Position barcode on bottom of page |
| Justification (Center) | Center barcode |
| Underlay (no) | Place it over existing text and graphics |
| Size (36) | Size of barcode 36 points (1/2 inch) |
| Code (128) | Create Code 128 barcode |
| Scale (0.5) | Stamp barcode at 50% of its original size |
| Text (This is a test) | Text of barcode “This is a test” |
| End_Message | End Stamp Item |

Creating Stamp Items for Image Stamps
Introduction
You can also stamp images onto a document. Images for stamping can be in JPEG, TIFF, or PDF format. Both standard JPEG and Photoshop JPEG formats are supported.
For convenience, the parameters that pertain to image stamping are repeated here:
| Type | Parameter | Text | Image | Default | Comments | |
|---|---|---|---|---|---|---|
| Begin | Begin_Message | Start of stamp item | ||||
| Label | Name | Name of stamp | ||||
| UndoLabel | Permits the later removal of a stamp | |||||
| Type | Required: Specifies type of stamp | |||||
| Pagination | StartPage | 1 | Start page for stamp | |||
| EndPage | -1 | End page for stamp | ||||
| PageIncrement | 1 | How many pages to skip between stamps | ||||
| PageRange | all | Which individual pages to stamp | ||||
| Positioning | Bottom, Left | From Options Block | Margins for stamp. Overrides margin values in options block | |||
| Position | Top | Position and orientation on page | ||||
| Justification | Center | Left,right or center | ||||
| Angle | 0 | Angle to rotate text stamp | ||||
| Underlay | No | Above (no) or beneath (yes) existing text/images | ||||
| PageBox | cropbox | Sets which set of page boundaries are used to position the stamp | ||||
| OffsetX | Horizontal placement offset | |||||
| OffsetY | Vertical placement offset | |||||
| Image Options | Path | Location of image file | ||||
| Scale | Specify size of image | |||||
| PageNumber | The page of a PDF to be stamped | |||||
| End | End_Message | End of stamp item |
Note: In older versions of AppendPDF Pro, only the Left and Bottom values are used for image stamping. AppendPDF Pro will ignore values for Right and Top. With version 5.0, all four coordinates (top, bottom, left and right) are used to position and scale the image. With all four coordinates set, the Scale parameter is ignored. If you wish to use the scale parameter, you should only specify Left and Bottom margins for the image stamp item.
Stamp parameters — detailed description
The Label, Pagination, and Positioning parameters work as they do with text stamps. The parameters exclusive to Image stamps are described below.
Label parameters
Type (required)
Type specifies the kind of image that will be stamped. Images include JPEG and TIFF. PDF images are defined as a separate type. To specify the type of image use the following:
Image to stamp a JPEG or TIFF file
Type (Image)
PDF to stamp a PDF file
Type (PDF)
Image options parameters
Path (required)
Path specifies the location of the image file to stamp. Enter the directory path, using the full path is best practice, and use the convention that is native to your operating system. Windows separates directories with backslashes: \, while UNIX systems use forward slashes: /. For the image called Image.jpg in our samples directory path will look like this on Windows:
Path (C:\Appligent\AppendPro\Samples\Image.jpg)
Scale (optional)
The Scale parameter increases or decreases the size of the original image when it is stamped onto the PDF document. A scale of 0.5 will make the image half (50%) of its original size, while a scale of 2 (200%) will double it.
Notes on positioning image files
Positioning works differently for images than it does for text.
For text, margin settings and positioning parameters act together to position a text stamp. The Top, Right, Bottom and Left parameters specify a rectangle, and the Position and Justification parameters place the text within that rectangle.
For images, the Bottom and Left parameters specify the location of the bottom left corner of the image.
The Position and Justification parameters are alternate means of specifying position. Use the Position parameter in place of Bottom for vertical positioning, and the Justification parameter in place of Left for horizontal positioning:
- Bottom overrides Position. If you specify a Bottom value, any Position value is ignored.
- Left overrides Justification. If you specify a Left value, any Justification value is ignored.
For example, you could specify that the left and bottom corner is a (0,0), but then you cannot center the image on the page as well.
In either case, use the Scale parameter to size the image.
A sample image stamp item
For example, the figure below shows the stamp item in letterstamp.txt to place a signature:
| # — Stamp Item — | Comment |
| Begin_Message | Begin Stamp Item |
| Name (Signature) | Named Signature |
| Type (Image) | Image stamp |
| StartPage (1) | Start stamp on first page |
| EndPage (-1) | Stamp to the last page (stamp only last page) |
| Left (50) | Left, bottom corner of image is 50 points from left edge of page |
| Bottom (220) | Left, bottom corner of image is 220 points from bottom of page |
| Underlay (No) | Place it over existing text and graphics |
| Path (./samples/stampfiles/sig.jpg) | Use image file named sig.jpg in ./samples/stampfiles directory |
| Scale (1) | Place image at actual size |
| End_Message | End Stamp Item |
Stamping a PDF file
Set the Type parameter to PDF to stamp a PDF file onto your document. For example, if you have a company letterhead in PDF format, you can stamp this on all your computer generated invoices to create personalized, professional invoices.
Some notes about stamping PDF files:
- If the PDF document contains more than one page, the first page will be stamped onto your document by default. If you want to stamp an image of a different page use the PageNumber parameter listed below.
- PDF files are usually full page size. PDF stamps are convenient for stamping information that is already positioned on a page so you don’t have to worry about manually placing individual elements by specifying position in points.
- The white areas in a PDF stamp are not transparent. Make sure the stamp does not interfere with the content of your document and that you set Underlay to Yes. You can also crop the PDF page in Acrobat if the stamp does not fill the entire page to remove extra white areas.
Image options parameters
PageNumber (optional)
If you are placing an image of Type (PDF), and the PDF document has more than one page in the file, use the PageNumber option to specify the PDF page number that has the PDF image you want to stamp into your document. If you do not enter a PageNumber, the first page of the PDF will be used as the image stamp.
A sample PDF stamp item
For example, the figure below shows the stamp item in letterstamp.txt to place a PDF file looks like this:
| # — Stamp Item — | Comment |
| Begin_Messge | Begin Stamp Item |
| Name (Return Address) | Named Return Address |
| Type (PDF) | PDF Stamp |
| StartPage (1) | Start on first page |
| EndPage (1) | Stamp first page only |
| Bottom (0) | Left, bottom corner of image is on the left edge of page |
| Left (0) | Left, bottom corner of image is on the bottom of page |
| Underlay (Yes) | Place it over existing text and graphics |
| Path (./samples/stampfiles/letterhead.pdf) | Use image file named letterhead.pdf in ./samples/stampfiles directory |
| End_Message | End Stamp Item |
Using Variables in Stamp Files
Introduction
When you are working with documents, there is a lot of information that varies from document to document such as dates, times, filenames, etc. Even within a document there are things that change from page to page, such as page numbers or headers and footers. AppendPDF Pro provides variables that can stamp this information into your document.
Variables substitute for text in the Text parameter. Each variable is case sensitive and has a specific output. They are replaced at run-time with the information they represent. The variables can mix with text. For example, to stamp the date a file was created, create a stamp item with the following Text parameter:
Text (This file was created on %a., %b. %d.)
The stamp appears as:
This file was created on Wed., Oct. 07.
Notice that we placed the appropriate punctuation as needed.
All variables must be preceded by the percent (%) character. If the % character is missing, the variable name will appear in the stamped text (“a” instead of “Wed”). If you want to use the % character in a stamp, it must be listed in the stamp file as %%.
The Variables
The table below lists all the variables showing the variable name, what it does, and example output.
| Variable | Format | Example Output |
|---|---|---|
| %A | full weekday name | Friday |
| %a | abbreviated weekday name | Fri |
| %B | full month name | October |
| %b | abbreviated month name | Oct |
| %<page number>C | consecutive Bates numbering across files | 000001 |
| %c | local date and time | Friday, October 03, 2003 7:36:24 PM |
| %D | ordinal suffix for dates | 1st, 2nd, 3rd, 4th etc. |
| %d | day of month | 15 |
| %G | total number of pages | 30 |
| %<page number>g | page number | 1 |
| %H | hours, 00–23 | 13 |
| %I | hours, 01–12 | 01 |
| %i<info field name> | PDF info dictionary value: Author, Title, Subject, Keywords | Sample.pdf (Title), Jane Smith (Author), Security (Keywords) |
| %<page number>J | Bates page numbering up to 999999 | 000001 |
| %j | day of the year, 001–366 | 099 |
| %M | minutes, 00–59 | 25 |
| %m | month, 1–12 | 10 |
| %N | document filename | file.pdf |
| %n | new line; use for multi-line stamps | sample stamp, line 1 sample stamp, line 2 sample stamp, line 3 |
| %P | full document pathname | c:\MyDocuments\Stamp1.pdf |
| %p | local equivalent of AM or PM | PM |
| %r | lowercase Roman numerals for page numbers | xii |
| %R | uppercase Roman numerals for page numbers | XII |
| %S | seconds, 00–61 | 10 |
| %U | week of the year, 01–53 where Sunday is the first day of the week | 36 |
| %W | numeric week of the year, 00–53 where Monday is the first day of the week | 36 |
| %w | numeric weekday, 0–6 where Sunday is 0 | 5 |
| %X | local time representation | 05:35:10 |
| %x | local date representation | 10/03/03 |
| %Y | year with century | 2003 |
| %y | year without century, 00–99 | 03 |
| %% | % (use when stamp must include percent symbol) | % |
A sample stamp item using variables
For example, the figure below shows the stamp item in letterstamp.txt to place the current date:
| # — Stamp Item — | Comment |
| Begin_Message | Begin Stamp Item |
| Name (Current Date) | Named Current Date |
| Type (Text) | Text stamp |
| StartPage (1) | Start on first page |
| EndPage (1) | Stamp first page only |
| Top (620) | Top margin 620 points from bottom of page |
| Left (44) | Left margin 44 points from left side of page |
| Position (top) | Position the top of the text along the top margin |
| Justification (left) | Left justify the text |
| Underlay (no) | Place it over existing text and graphics |
| Size (12) | Font size 12 points |
| Font (Helvetica) | Font Helvetica |
| TextMode (0) | Solid text |
| Text (%A %B %d, %Y) | Insert Weekday Month day, year |
| WordWrap (No) | Do not wrap to a new line |
| ColorSpace (DeviceGray) | Color of stamped text |
| Color (0) | Black text |
| End_Message | End Stamp Item |
Stamping page numbers
Use the variable %<page number>g to stamp page numbers onto your document. <page number> is optional, the default value is the logical number of the page. You can specify a different page to start with the parameter StartPage, the default for start page is the first page.
For example, if you would like page numbering stamps to begin on page 5, you need to tell AppendPDF Pro two things:
- Where to begin stamping: use StartPage (<page number>) in your stamp file
- What number to use when stamping that page: use Text (%<page number>g) in your stamp file
If you do not want to stamp page numbers to the end of the file, you can also specify an EndPage.
The following examples show how to apply page numbers for different circumstances.
Example: Start on the first page with page number 1
To start numbering on the first page, using page number 1, your stamp item would have the following line:
Text (%g)
The default start page is 1, and the default page number would be 1, the logical number of the page.
Example: Start on page 5 with page number 5
To start numbering on the page 5, using page number 5, your stamp item would have the following lines:
StartPage (5)
Text (%g)
The start page is specified as page 5, and the default page number would be 5, the logical number of the page.
Example: Start on page 5 with page number 1
To start numbering on the page 5, using page number 1, your stamp item would have the following lines:
StartPage (5)
Text (%1g)
The start page is specified as page 5, and the page number is specified as 1. You can use this to start numbering the body of a document at 1 when the body starts after 4 pages of introductory material.
Using Bates notation for page numbering
Use the variable %<page number>J to stamp page numbers using Bates notation. With Bates notation each page number uses a fixed number of digits, filled with leading zeros. For example, with a six-digit Bates number (the default), page 2 will be written as 000002 and page 4145 will be written as 004145.
If you want to use a number of digits other than the default six-digit format use the BatesDigit parameter. For example, to change page 2 to be written as 0002 and page 4145 to be written as 4145, your stamp item would have the following line:
BatesDigit (4)
You can also specify how many digits to use when you run AppendPDF Pro by using the -j option on the command-line. Refer to -j <n> for more information.
Note: The value of the BatesDigit parameter will override the -j option.
If you would like to start numbering at a number other than 000001, place the number to start between % and J. For example, to start numbering at page 000501, use %501J in the Text parameter as shown in the figure below. AppendPDF Pro will insert the leading zeros.
Adding a prefix to Bates numbers
You can add a prefix to Bates numbers by including the prefix before the variable, such as prefix text CaseABCD. The example below will stamp the StartPage with CaseABCD 000001, the next page with CaseABCD 000002, and so on.
CaseABCD %J
Prefixes can be combined with custom start pages. The example below will start page numbering at CaseABCD 000501.
CaseABCD %501J
Bates numbering across files
Use the variable %<page number>C to stamp Bates page numbers across multiple files. For example, if you stamp files Input001.pdf to Input005.pdf, and use the %C variable in your stamp file, the pages would be numbered as shown in the table below:
| Filename | Number Of Pages |
Bates Number Stamped |
|---|---|---|
| Input001.pdf | 23 | 000001 to 000023 |
| Input002.pdf | 42 | 000024 to 000065 |
| Input003.pdf | 25 | 000066 to 000090 |
| Input004.pdf | 17 | 000091 to 000107 |
| Input005.pdf | 37 | 000108 to 000144 |
Creating multi-line stamps
Use the %n variable to create a new line (or carriage return) in the stamped text. For example, if you would like to stamp a company address as a header, enter the text of the stamp in your Text parameter, including a %n wherever you wish a line break:
Text (Appligent, Inc.%n22 East Baltimore Avenue%nLansdowne, PA 19050 USA)
The stamp will appear as shown below:
Appligent, Inc.
22 East Baltimore Avenue
Lansdowne, PA 19050 USA
There is no limit to the amount of text or number of lines you can use. You are limited only by the size of the page or the margins you have set.
Note: If you will be stamping footers at the bottom of the page, AppendPDF Pro begins stamping at the Bottom margin. To prevent your stamp from running off the page, increase the Bottom margin.
Stamping information from Document Properties fields
The Document Properties are from Adobe Acrobat or Acrobat Reader or other quality PDF viewers. Within Acrobat or Acrobat Reader, select File > Properties > Description. A dialog window will appear:
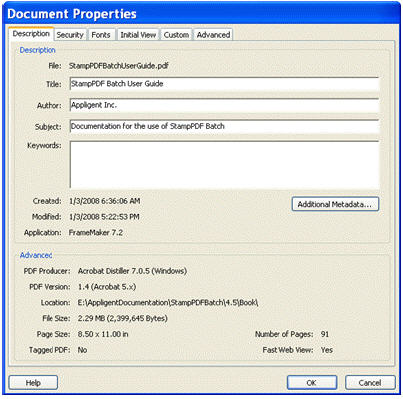
AppendPDF Pro can access the information here and stamp it into your PDF file. Take care to specify the variables exactly as they appear in the Document Properties dialog using exact capitalization and spelling:
- %i(Title)
- %i(Author)
- %i(Subject)
-
%i(Keywords)
For these variables to stamp correctly on a PDF document, the information must be present in the Document Properties fields. If you enter a Text parameter to stamp Author and the Author field is blank in the Document Properties dialog window, AppendPDF Pro won’t stamp any information for this variable.
Letterstamp Example
The example below shows the entire letterstamp.txt including the examples we’ve been using throughout this chapter.
| #Options | Comment |
| Begin_Options | Begin Options block |
| Version (2) | Stamp file format version 2 |
| TopMargin (36) | Top margin 36 points (1/2 inch) |
| BottomMargin (36) | Bottom margin 36 points (1/2 inch) |
| LeftMargin (36) | Left margin 36 points (1/2 inch) |
| RightMargin (36) | Right margin 36 points (1/2 inch) |
| End_Options | End Options block |
| # — Stamp Item — | Comment |
| Begin_Message | Begin Stamp Item |
| Name (Appligent Logo) | Named Return Address |
| Type (PDF) | PDF stamp |
| StartPage (1) | Start on first page |
| EndPage (-1) | Stamp to the last page |
| Bottom (700) | Left, bottom corner of image is on the left edge of page |
| Left (30) | Left, bottom corner of image is on the bottom edge of page |
| Underlay (yes) | Place it over existing text and graphics |
| Path (./samples/stampfiles/letterhead.pdf) | Use image file named letterhead.pdf in ./samples/directory |
| End_Message | End Stamp Item |
| # — Stamp Item — | Comment |
| Begin_Message | Begin Stamp Item |
| Name (Current Date) | Named Current Date |
| Type (Text) | Text stamp |
| StartPage (1) | Start on first page |
| EndPage (1) | Stamp only first page |
| Top (620) | Top margin 620 points from bottom of page |
| Left (44) | Left margin 44 points from the left of page |
| Position (top) | Position of top of the text along the top margin |
| Justification (left) | Left justify the text |
| Underlay (no) | Place it over existing text and graphics |
| Size (12) | Font size 12 points |
| Font (Helvetica) | Font Helvetica |
| TextMode (0) | Solid text |
| Text (%A %B %d, %Y) | Insert Weekday Month day, Year |
| WordWrap (No) | Do not wrap to a new line |
| ColorSpace (DeviceGray) | Color of stamped text |
| Color (50) | Medium shade of gray |
| End_Message | End Stamp Item |
| # — Stamp Item — | Comment |
| Begin_Message | Begin Stamp Item |
| Name (Watermark) | Named Watermark |
| Type (Text) | Text stamp |
| StartPage (1) | Start on page 1 |
| EndPage (-1) | Stamp to the last page |
| PageIncrement (1) | Stamp every page |
| Position (diag-topleft) | Position diagonally from the top left corner |
| Justification (center) | Center it both diagonally and horizontally on the page |
| Underlay (Yes) | Place it underneath existing text and graphics |
| Size (84) | Text size is 84 points |
| Font (Courier Bold) | Font is Courier Bold |
| TextMode (1) | Text will be an outline |
| Text (Confidential) | Text says “Confidential” |
| WordWrap (No) | Do not wrap to a new line |
| ColorSpace (DeviceGray) | Color of stamped text |
| Color (50) | Medium shade of gray |
| End_Message | End Stamp Item |
| # — Stamp Item — | Comment |
| Begin_Message | Begin Stamp Item |
| Name (Signature) | Named Signature |
| Type (Image) | Image stamp |
| StartPage (1) | Start on first page |
| EndPage (-1) | Stamp to the last page (stamp only last page) |
| Left (50) | Left, bottom corner of image is 50 points from left edge of page |
| Bottom (225) | Left, bottom corner of image is 225 points from bottom of page |
| Underlay (No) | Place it over existing text and graphics |
| Path (./samples/stampfiles/sig.jpg) | Use image file named sig.jpg in ./samples/stampfiles directory |
| Scale (1) | Image places at actual size |
| End_Message | End Stamp Item |
| # — Stamp Item — | Comment |
| Begin_Message | Begin Stamp Item |
| Name (Disclaimer) | Named Disclaimer |
| Type (Text) | Text stamp |
| StartPage (1) | Start on first page |
| EndPage (-1) | Stamp to the last page |
| PageIncrement (1) | Stamps ever page |
| Position (bottom) | Positioned along bottom of page |
| Justification (center) | Center the text on page |
| Underlay (No) | Place it over existing text and graphics |
| Size (12) | Font size 12 points |
| Font (Times Bold) | Font Times Bold |
| TextMode (0) | Solid Text |
| Text (For use only with StampPDF Batch%nThis signature etc…) | Insert disclaimer text. Note %n variable to insert a line break |
| WordWrap (No) | Do not wrap to a new line |
| ColorSpace (DeviceRGB) | |
| Red (220) | Light Red |
| Green (67) | |
| Blue (71) | |
| End_Message | End Stamp Item |
| #Appligent, Inc. | Comment |
Options
AppendPDF Pro Options
Refer to General Command-Line Options for details on the general options.
Refer to Applying Standard Security for more information about the security options and working with encrypted documents.
The following is an example of command syntax for AppendPDF Pro.
$ appendpro [options] parameterfile1.txt [parameterfile2.txt...]
The table below shows command-line options for AppendPDF Pro.
Options summary
| OPTION | PARAMETER | DESCRIPTION |
|---|---|---|
| -cmds | filename.txt | Process a collection of files to run at one time. |
| -b | Include bookmarks. | |
| -f | Start page numbering from the first page. | |
| -extra | Include named destination bookmarks, links, and article threads. | |
| -eb | Keep embedded files. | |
| -u | string | Remove old stamps with UndoLabel |
| -listfonts | Print list of available fonts in the appligent_home fonts folder | |
| -vars | string | List of variables to be substituted in the Stamp file (“name,value,name,value”) |
| -vardelimiter | string | Delimiter character for variables in the Stamp File ( default is % ) |
| -portfolio | icons|details | Build PDF Portfolio, also called Portable Collection |
-cmds — Allows you to process a collection of commands at one time (optional)
To process multiple commands quickly and efficiently, use the -cmds option. The file specified by -cmds, the commands file, should contain one or more single-line commands. Each command is just like an ordinary AppendPDF Pro command line without the executable name. The commands file does not support wildcards in file names. The following is an example of command-line syntax when running with -cmds:
$ ./appendpro -p -l logfile.txt -cmds CommandFile.txt
CommandFile.txt contains a list of commands for AppendPDF Pro to process. Below is an example of CommandFile.txt:
-p -iso32000 /appligent/appendpro/samples/parameters.txt
-p -iso32000 /appligent/appendpro/samples/paramsbasic.xml
-p -optimize /appligent/appendpro/samples/tutorial.txt
-p -w /appligent/appendpro/samples/paramscomplete.xml
-b — Include bookmarks (optional)
Specifies to include the bookmarks of the original PDF files in the new, appended document. If a page (or pages) from an input document has a bookmark, that bookmark will appear in the bookmarks list, in the correct order, in the final appended document.
Note: AppendPDF Pro handles bookmarks that have been created using “Named Destinations” in a special way. If a file has bookmarks with Named Destinations and you append it using -b, AppendPDF Pro will convert the Named Destinations to Regular Destinations and then make the bookmark. Other Named Destinations that are not bookmarks will be ignored.
-f — Start page numbering from the first page (optional)
Specifies to start counting pages from the first page of the completed document. This option will include the cover page and table of contents in the page numbering. The stamp files determine how a document is numbered. The stamp file in the Extras block will only stamp the documents that are listed in the Source block. Using the -f option, AppendPDF Pro will count the pages of the cover and TOC and start numbering the body documents at the next number.
For example, if there is one page for the cover and two pages for the TOC, the page number stamped on the first page of the body document will be 4. If -f is not used, page numbering will reset to 1 at the body of the appended documents. The cover and Table of Contents will have their own numbers.
Note: Acrobat and Acrobat Reader often start numbering with the first page of the document. The -f option ensures that the page numbers in the Table of Contents match the page numbers in Acrobat’s navigation pane.
-extra — Copy named destination bookmarks/links and article threads (optional)
This flag will copy any named destination bookmarks/links, and article threads into the appended document. The -extra flag will only include named destination bookmarks/links and article threads when appending complete documents. If you are specify a page range for your input files and -extra is on the command line, no extra bookmarks or article threads will be copied over into the appended document.
-eb — Keep embedded files (optional)
AppendPDF Pro will keep any embedded files included in input files as part of the final output file. This option supports any file type that Adobe Acrobat can embed into a PDF document.
-u — Remove old Stamps with UndoLabel
Removes stamps that were labeled with in the stamp file. AppendPDF Pro cannot remove stamps applied without an UndoLabel. When removing a stamp, you must supply a parameter file on the command line at the same time.
-listfonts — Prints a list of available fonts for use with AppendPDF Pro.
This flag lists all the fonts that are available to stamp using AppendPDF Pro. AppendPDF Pro version 5.5 now supports OpenType and TrueType fonts in addition to Postscript Type 1 fonts.
Below is a small example of some of the fonts that are shipped with AppendPDF Pro. You will see these when you run -listfonts:
 AdobeFanHeitiStd-Bold
 AdobeGothicStd-Bold
 AdobeHebrew-Bold
 AdobeHebrew-BoldItalic
 AdobeHebrew-Italic
 AdobeHebrew-Regular
 AdobeHeitiStd-Regular
 AdobeMingStd-Light
 AdobeMyungjoStd-Medium
 AdobePiStd
 AdobeSongStd-Light
 AdobeThai-Bold
 AdobeThai-BoldItalic
 AdobeThai-Italic
 AdobeThai-Regular
 CourierStd
 CourierStd-Bold
 CourierStd-BoldOblique
 CourierStd-Oblique
 Dingbats
 KozGoPr6N-Medium
 KozMinPr6N-Regular
 MinionPro-Regular
 MyriadPro-Regular
 Symbol
There are two font directories.
The default font directory is found under the AppligentHome directory in APDFL10.1.0a/Resource/Font. On Windows, the AppligentHome directory is in the AllUsers Application data directory.
Windows XP: C:\Documents and Settings\All Users\Application Data\Appligent
Windows Vista and later: C:\ProgramData\Appligent
Unix: /usr/local/appligent
You can also specify an additional font directory, the AP font directory. The path to the AP font directory is saved in an environment variable called AP_FONT_DIR. You will be prompted to enter a font directory during installation. The fonts that are in the AP_FONT_DIR will also show in addition to the fonts that are shipped with AppendPDF Pro when you run -listfonts.
On Windows: Environment variables can be set on Windows under the System Properties. To display the System Properties, right click on “My Computer” and select properties. On the bottom of the Advanced tab, click the button labeled “Environment Variables”. Under system variables, you will see an entry for AP_FONT_DIR. Select this entry, and click edit. You can then change the
variable’s value to the path of the current font directory.
On Unix: As the other environment variables for AppendPDF Pro, AP_FONT_DIR is set in the appendpro script. The directory set in an environment variable in the script, or be set for the shell.
Command Line Variable Substitution
-vars — List of variables to be substituted in the Stamp File ( “name,value,name,value” )
**On Windows, do not use * or ? as the vardelimiter because these are wildcard characters that might lead to unintended consequences**
AppendPDF Pro will be able to replace variables found within the stamp file, and thus substitute the text that it stamps based on parameters set on the command line. If the text of an item contained in the stamp file contains one or more pairs of percent signs, the text between each pair of percent signs is the name of a variable to be replaced.
The command line uses the “-vars” flag to assign a value to each stamp. AppendPDF Pro replaces each variable name (including the percent signs) by its value. The first part is the variable name set in the stamp file and the information following after the comma is the value for that variable. For example, if you have Text Parameters set with %First_Name% and %Last_Name% in the stamp file, your command line would look similar to the example below:
appendproapp -p -vars "First_Name,Jane,Last_Name,Doe" ParamFile.txt
There are rules that govern text replacement:
- Variable names can consist of some characters from the ASCII range 32-126, including upper and lower case letters, numbers, spaces (but not leading or trailing spaces), and underscores.
- Values can contain any UTF-8 characters except null.
- Two consecutive commas in a value field are treated not as separators, but as a single comma that is part of the value.
- A %variable-name% in the stamp file Text parameter that is not part of the -vars option will be left unchanged, but be aware that the percept sign, when coupled with the character following it, could be construed as a stamp variable, leading to unexpected results.
- When you specify -vars on the command line, each stamp must have an even number of percent signs. If you want to mix new text replacement variables and traditional stamp variables in the same stamp file, you will need to add an additional percent sign in front of the AppendPDF Pro built-in variable. The Text Parameters in your stamp file would look similar to the example below:
Text (Page %%g) —- this is an AppendPDF Pro built-in variable for Page number. Add an extra % in front of the %g variableText (My Full Name is %First_Name% %Last_Name%)
If you omit the -vars flag from the command line, %%g in the Text parameter above will be stamped as %g on the output PDF file.
- You can also add AppendPDF Pro built-in variables to the command line. Please note, you need to add double quotes around the built-in variables on Windows and single quotes on Unix. Example of Text Parameter in the stamp file:
Text (Today is %My_Date%)
WINDOWS:  appendproapp.exe -p -vars "My_Date,%c" ParamFile.txt
Unix:  appendproapp -p -vars 'My_Date,%c' ParamFile.txt
NOTE: Text substitution on the command line must be composed of letters, numbers, underscores, and spaces, with no leading or trailing space.
-vardelimiter —Delimiter character for variables in the Stamp File ( default is % )
**On Windows, do not use * or ? as the vardelimiter because these are wildcard characters that might lead to unintended consequences**
By default the character used to surround the variable name is the percent sign (%) character. This option allows you to use some other character beside the percent sign.
Notes about Command Line Variable Substitution
Microsoft attaches special meaning to a bunchOfChars bunchOfChars%. So, there may be cases where the user tries to use percent signs in the values in -vars, but Microsoft intervenes.
Another place where Microsoft uses percent signs is in the syntax of its DOS for command. There could be some misinterpretation.
Additional Notes:
- On Unix or Linux, enclose the objects of ‘-vars’ and ‘-vardelimiter’ in (single quotes). This will prevent the shell from modifying the text.
- On Windows, enclose the object of “-vars” in double quotes. This instructs Windows to treat the quoted text as a single entity.
- On any platform, the vardelimiter should not be any character that appears in the stamp file.
- On windows the vardelimiter should be neither * or ? because these are wildcard characters that might lead to unintended consequences. On Unix/Linux, these characters are acceptable provided you enclose the vardelimiter character in apostrophes.
- If you specify “-vardelimiter” , neither the delimiter nor a percent sign may appear inside the “-vars” string.
- On Windows, if the “-vars” option contains percent signs inside a batch (*.bat) file, each percent sign must be doubled. If the “-vars” option contains percent signs inside a batch file, and if this text is passed to another batch file, each percent sign must be quadrupled. Et cetera..
PDF Portfolio
-portfolio <icons|details> — Build PDF Portfolio, also called Portable Collection
Instead of reassembling the PDF document by appending pages together; a PDF Portfolio inserts the documents without altering the content of the original component files. This allows any file type, even files which are encrypted or digitally signed, to be added to the PDF Portfolio without first converting to PDF or changing the encryption on the documents or breaking the digital signatures. Output PDF Portfolios can only be viewed under Acrobat/Reader XI and DC.
Digitally Signed Files
Files containing digital signatures can be inserted into a PDF Portfolio without breaking or altering the digital signature in any way.
Encrypted Files
Files can be encrypted using different combinations of owner passwords, user passwords and permissions.
Non-PDF Files
A PDF Portfolio supports non-PDF file types for example; Microsoft Office documents including Word, Excel and Powerpoint, TIFF image files, Photoshop files, Video files, XML Based XFA files, etc.
Notes about PDF Portfolios
- Portable Collections are only supported under Acrobat XI & DC
- TOC page & stamping on output files is not supported. Cover page can be added but stamping on this page is not supported (At times a blank cover page may appear briefly on the screen when viewing the portable collection)
- Individual pages and page ranges are not supported. The entire document will be appended
- If the order of the output files does not appear correct, click on the “Description” Column to sort the order
Running AppendPDF Pro
Running AppendPDF Pro
This section gives a variety of examples to help guide you through using AppendPDF Pro on the command-line.
- The basic command
- Using more than one parameter file
- Using wild cards
- Keeping bookmarks and using most options
Note: AppendPDF Pro is not compatible with documents containing form fields or with documents that are write-protected, password-protected, or encrypted. Make sure all form fields are removed or flattened using FDFMerge or FDFMerge Lite. Make sure all files are write-enabled before using AppendPDF Pro.
The basic command
The simplest form of the AppendPDF Pro command, shown on Windows is:
> .\appendpro .\Samples\paramsbasic.xml
This creates a new output file defined in paramsbasic.xml as paramsbasic_xml.pdf in AppendPDF Pro, appending the pages from the documents listed there. All stamp files, TOC pages, and cover pages are already built into the parameter file, so they are not needed on the command line.
Note: Make sure that all path names are correct for all files listed on the command line and in the parameter file.
Using more than one parameter file
AppendPDF Pro can process multiple parameter files at one time. Use the -l and -p options to create a log file. Progress and error messages are printed to the specified log file, and to the screen, as shown below on Mac OS X / UNIX:
$ ./appendpro -p -l logfile.txt ./samples/paramsbasic.xml ./samples/paramsstd.xml
Processing parameter file : ./samples/paramsbasic.xml
Output : ./samples/paramsbasic_xml.pdf
Appending source files...
Appended : ./samples/pdfs/sample1.pdf
Appended : ./samples/pdfs/sample2.pdf
Appended : ./samples/pdfs/sample3.pdf
Appended : ./samples/pdfs/sample4.pdf
Appended : ./samples/pdfs/sample3.pdf
Appended : ./samples/pdfs/sample3.pdf
Appended : ./samples/pdfs/sample4.pdf
Appended : ./samples/pdfs/sample4.pdf
done.
Processing parameter file : ./samples/paramsstd.xml
Output : ./samples/paramsstd_xml.pdf
Building Table of Contents...
Appending source files...
Appended : ./samples/pdfs/sample1.pdf
Appended : ./samples/pdfs/sample2.pdf
Appended : ./samples/pdfs/sample3.pdf
Appended : ./samples/pdfs/sample4.pdf
Appended : ./samples/pdfs/sample3.pdf
Appended : ./samples/pdfs/sample3.pdf
Appended : ./samples/pdfs/sample4.pdf
Appended : ./samples/pdfs/sample4.pdf
done.
AppendPDF Pro completed successfully.
Make sure that all path names are correct for all files listed on the command line and in the parameter file.
If the same documents are used in different parameter files, AppendPDF Pro will open and close them separately, each time they are needed. To process three separate parameter files, param1.xml, param2.xml, and param3.xml:
$ ./appendpro ./path/param1.xml ./path/param2.xml ./path/param3.xml
Using wild cards
Instead of listing all the files on the command line, use ? or * to match one or more characters in a filename:
param?.xml processes any file named “param” and any single character and a .xml extension:
$ ./appendpro param?.xml
*.xml processes any file in the current working directory with the .xml extension:
$ ./appendpro *.xml
param* processes any file in the current working directory with “param” in its file name, both xml and txt files:
$ ./appendpro param*
* processes all files in the current working directory both xml and txt files:
$ ./appendpro *
Note: AppendPDF Pro will fail if it tries to process a file that is not a valid parameter file. We recommend always using .txt or .xml in file specifications (the first two examples). If you leave out the extension, make sure the working directory contains only valid parameter files.
Keeping bookmarks in appended files
Use the -b option in AppendPDF Pro to keep bookmarks:
$ ./appendpro -b paramsstd.xml
If a page in a source document is bookmarked, the bookmark for that page will appear in the bookmarks list in the order that the page appears in the new appended document.
Using most options together
You may combine any AppendPDF Pro options together in one command:
$ ./appendpro -p -l mylog.txt -f -b paramsstd.xml
The output from this command will be a document as named in paramsstd.xml, with bookmarks. The screen will show progress information and all progress will be written to the log file, mylog.txt. By using -f, the page numbering will include the cover and table of contents pages.
AppendPDF Pro Examples
Here we examine some of the samples in the “Samples” subdirectory of AppendPDF Pro.
A basic append
Find the parameter file in the Samples directory.
To append the sample files:
- Change your working directory to the AppendPDF Pro directory.The parameter files paramsstd.xml, paramsletter.xml, paramsbasic.xml and parameters.xml use relative paths from here for all files. The example will fail if you do not run from this directory.
The default location for AppendPDF Pro on Windows is:
C:\Appligent\AppendPRO
On other platforms, it will be wherever you installed it.
- Enter the following command for UNIX and Mac OS X:
$./appendpro ./samples/paramsstd.xml
or in Windows:
> .\appendpro .\samples\paramsstd.xml
- Open the output files ./samples/paramsstd_xml.pdf in Acrobat or Acrobat Reader to see the results of the sample files appended together.
Creating a mailing package
Find paramsletter.xml in the Samples directory. This example uses lettersample.pdf as the cover page and uses the stamp file letterstamp.txt to stamp the cover page. A Table of Contents is created for the sample PDF files. The cover and Table of Contents pages are appended with the sample PDF files to create a mailing package. The stamp file, letterstamp.txt, is setup to apply several stamps to the appended document such as a company logo, letterhead, current date, a signature stamp and a confidential watermark.
Note: In the following example, we use relative path names for clarity. We recommend using full path names at all times.
To run the sample files:
- Change your working directory to the AppendPDF Pro directory.The stamp and parameter files use relative paths from here for the sample files. It will fail if you do not run from this directory.
- Enter the following command for UNIX and Mac OS X:
$./appendpro ./samples/paramsletter.xml
or in Windows:
> .\appendpro .\samples\paramsletter.xml
- Open ./samples/paramsletter_xml.pdf in Acrobat or Acrobat Reader to view the stamped, appended file.
Running the other samples
AppendPDF Pro includes the following other samples. Run them for more examples of what AppendPDF Pro can do.
- paramsbasic.xml — includes basic parameters
- paramscomplete.xml — includes all parameters
- paramsbarcode.xml — stamps barcodes on the sample PDF files
General Options
General options — summary
| OPTION | PARAMETER | DESCRIPTION |
|---|---|---|
| -r | RegNum | Pass registration number to AppendPDF or AppendPDF Pro. |
| -l | logfile | Write progress information or errors to a specified log file. |
| -p | Display progress messages to the console or screen. | |
| -n | Do not write anything to the console or screen. | |
| -v | Display version information. | |
| -h or -help | Display usage information. | |
| -i | Perform incremental save. | |
| -w | Linearize the file upon save. | |
| -optimize | Optimize the output file to try to reduce file size. | |
| -nocomp | Do not compress using Object Streams (resulting file is compatible with all versions of Acrobat). | |
| -comp | Compress using Object Streams (resulting file requires Acrobat 6 and later). | |
| -iso32000 | Set file for ISO 32000 compliance (PDF 1.7). |
General options — detailed
The following sections provide details on using the general command-line options.
-r <RegNum> — Pass registration number to AppendPDF or AppendPDF Pro
This option can be used to supply your registration number to AppendPDF or AppendPDF Pro from a script or another application:
$ appendpdfapp -r XXXX-XXXX-XXXX-XXXX-XXXX-XXXX [other options]parameterfile1.xml [parameterfile2.xml...]
$ appendproapp -r XXXX-XXXX-XXXX-XXXX-XXXX-XXXX[other options] parameterfile1.xml [parameterfile2.xml...]
This option is typically not necessary and is available for use in cases where the Appligent License File can not be located by the application because of runtime environment restrictions.
-l <logfile> — Create a log file (optional)
Specify a text file for any errors and progress messages. This option is helpful for debugging. The -l <logfile> option must be followed by a file name. If there are no errors, no file is written. If a log file is not specified, errors are written to the default log file, appendpdf.log. The default log file name is the same for both AppendPDF and AppendPDF Pro. Make sure that your log file is write enabled.
-p — Show progress (optional)
Write progress messages to the screen STDOUT, the standard output of your system, and to the default log file, appendpdf.log. This option is helpful for debugging and for understanding how AppendPDF or AppendPDF Pro works. If the -p option is present on the command line, all errors and progress messages are written to the default log file, appendpdf.log.
A note on using -p and -l <logfile> together
As outlined in the above sections, the -p option gives you progress messages and errors on your screen and the -l <logfile> option writes error messages to a file you specify. The table below provides more detail on using these options alone or together.
Using -p and -l <logfile>
| -l | -p | ERRORS FOUND |
RESULT |
|---|---|---|---|
| Nothing will be written to the screen or to the log file you specify. | |||
| Progress message will be written to the screen and appendpdf.log. | |||
| Progress messages will be written to the screen and to the log file you specify. | |||
| An appendpdf.log file will be created with the errors in your working directory. | |||
| Errors will be written to the log file you specify. | |||
| Errors will be written to appendpdf.log and your screen. | |||
| Both progress and error messages will be written to the screen and to the log file you specify. |
Therefore, -l <logfile> used on its own will only go into action if there are errors. With -p and -l <logfile> combined, you will get a text file with full details on AppendPDF or AppendPDF Pro operations whether there are errors or not.
-n — Do not write anything to screen (optional)
Do not write anything to the screen (or STDOUT). If you are running batch mode, this prevents progress messages from building up.
-v — Display version information (optional)
Display the version of AppendPDF or AppendPDF Pro you are running. This is important when corresponding with support@Appligent.com. In order to better understand your problem, we must know what version of the software you have. AppendPDF or AppendPDF Pro will not do anything else if you use this option.
-h or -help — Show usage (optional)
Display all available command-line options. AppendPDF or AppendPDF Pro will not do anything else if you use either of these options.
-i — Perform incremental save (optional)
An incremental save appends changed information to the end of the file. This is faster than a full save, but may result in a larger file. A full save is similar to using the “Save As…” command in Adobe Acrobat. It is a save that attempts to clean up a PDF file, often reducing its size.
-w — Linearize the file upon save (optional)
Save the output file as a linearized document (also known as optimization). Linearization reorganizes the file to make it more efficient for web delivery. Individual pages can be rendered before the entire document has downloaded, so the user can start reading the document sooner.
-optimize — Optimize the file (optional)
This flag will do the following: 1) encode any non-encoded streams using Flate compression, 2) remove ASCII85 filters from all streams, 3) replace LZW encoded streams with Flate encoding, 4) merge identical XObjects and images, 5) optimize common sequences in page content, and 6) merge identical font descriptors and encodings. This option will usually result in a smaller file size.
-nocomp — Do not compress using Object Streams (optional)
This flag will not compress Object Streams, resulting in a document that is compatible with all versions of Acrobat.
-comp — Compress using Object Streams (optional)
This flag will compress Object Streams, resulting in a document that is compatible with Acrobat 6.0 and later.
-iso32000 — Set file for ISO 32000-1 compliance (optional)
This flag sets the file for compliance with ISO 32000-1:2008 (PDF 1.7).
Command Collections
The -cmds option allows you to process a collection of files at one time
To process multiple commands quickly and efficiently, use the -cmds <filename> option. The file specified by -cmds, the commands file, should contain one or more single line commands. Each command is just like an ordinary AppendPDF or AppendPDF Pro command-line without the executable name. The commands file does not support wildcards in filenames. Below are examples of command line syntax when running with -cmds:
$ ./appendpdfapp -p -l logfile.txt -cmds CommandFile.txt
$ ./appendproapp -p -l logfile.txt -cmds CommandFile.txt
CommandFile.txt contains a list of commands for AppendPDF or AppendPDF Pro to process. This is an example of a CommandFile.txt file:
-p -iso32000 /appligent/appendpro/samples/parameters.txt
-p -iso32000 /appligent/appendpro/samples/paramsbasic.xml
-p -optimize /appligent/appendpro/samples/tutorial.txt
-p -w /appligent/appendpro/samples/paramscomplete.xml
Applying Standard Security
Acrobat Standard Security
Acrobat standard security allows you to control who can access your document and, by setting permissions, how much they can edit or print. Acrobat offers three levels of security:
- Low-level encryption (40-bit key length) — Compatible with Acrobat versions 3 and later.
- High-level encryption (128-bit key length) — Compatible with Acrobat versions 5 and later.
- AES encryption (128-bit key length) — Available only with Acrobat 8 and later.
- AES encryption (256-bit key length — available for SecurSign & APCrypt only) — Available only with Acrobat X, XI and DC.
High level encryption provides a higher level of security and finer control over security features. The minimum level of security that you can set is to allow any changes except extracting pages.
Once you set encryption on a document, it cannot be processed in other ways unless the password is available to the processing software. You can also change or remove encryption in Acrobat.
Owner and user passwords
All levels of security allow you to set passwords for the document:
- User password: controls who may view a document.
- Owner password (required): controls who may make changes to permissions and passwords securing a document.
You must set an Owner password to apply encryption. Do not use the same password for both User and Owner. If the same password is used for both, only the User password will be set.
Different versions of Acrobat use different terminology to refer to the same concepts. You’ll see more of this in High-level encryption password nomenclature as described in the following table for various versions of Adobe Acrobat:
| Type | Acrobat X, XI & DC |
|---|---|
| User | Document Open |
| Owner | Change Permissions |
Encryption Permissions
Acrobat allows you to set various permissions to limit access to the information in the document. Adobe changes the use of permissions when they moved from 40-bit key lengths to 128-bit key lengths. The sections below detail the different options and permissions based on using 40-bit or 128/256 bit key lengths.
The following is an example of the security options in Acrobat X, XI & DC:
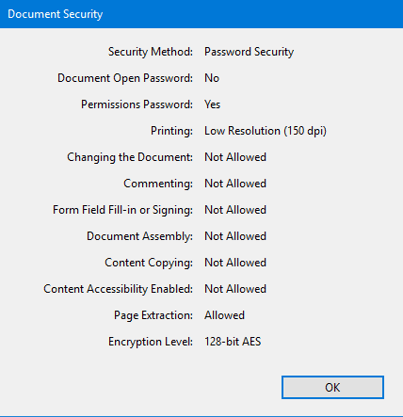
Refer to Verifying Security Features for instructions on displaying the security options.
Encryption options
The table below describes low-level encryption options.
High level encryption provides additional security options as are defined in the table below.
| Type | Option | Parameter | Description |
|---|---|---|---|
| Encryption | -encrypt | Encrypt using the RC4 stream cypher (same as -rc4) | |
| -aes | Encrypt using the Advanced Encryption Standard (AES) algorithm (SecurSign & APCrypt) | ||
| -rc4 | Encrypt using the RC4 stream cypher | ||
| -keylength | 128 | Key length. Valid options are 40, 128 or 256. Default is 128. (256 bit – SecurSign & APCrypt Only) | |
| -ownerpass | oPassword | New owner password (required) | |
| -userpass | uPassword | New user password | |
| -onlyattach | Encrypt document attachments only using AES; to use the PDFas a secure envelope for the attachments (requires -userpass) (SecurSign Only) | ||
| -remove | Remove all encryption from the PDF document. (Requires -ownerpass) | ||
| -d | Password | Old owner password – (Except AppendPDF & AppendPDF Pro) | |
| Permissions | -noaccess | Do not allow accessibility (128 & 256) – (256 bit – SecurSign & APCrypt Only) | |
| -nocopy | Do not allow copying text or graphics | ||
| -noprint | Do not allow printing | ||
| -nohighres | Do not allow high resolution printing (128 & 256) – (256 bit – SecurSign & APCrypt Only) | ||
| -nomodify | Do not allow modifying the document | ||
| -nonotes | Do not allow adding or changing notes or form fields | ||
| -nofill | Do not allow filling in form fields or signing (128 & 256) – (256 bit – SecurSign & APCrypt Only) | ||
| -noassembly | Do not allow document assembly (128 & 256) – (256 bit – SecurSign & APCrypt Only) |
The first four permissions can be used in any combination, except you can’t use -noprint and -nohighres together. Choose one or the other. The last four must be used in specific combinations that Acrobat accepts.
-encrypt — Encrypt output file (optional)
Specifies applying encryption to the output file using the RC4 stream cypher. This option is the same as -rc4.
-aes — Encrypt using the AES cryptography algorithm (optional) (SecurSign & APCrypt Only)
Encrypt the output file using the Advanced Encryption Standard (AES) cryptography algorithm.
-rc4 — Encrypt using the RC4 cryptography algorithm (optional)
Specifies applying encryption to the output file.
-keylength <int> — Encryption level (optional)
Specifies the encryption key length used to encrypt the document: either 40-bit, 128-bit or 256-bit. (256- bit SecurSign & APCrypt Only)
If you do not specify key length, the default is 128-bit.
-ownerpass <password> — New owner password (required)
Specifies a new Owner password to apply encryption. An Owner password restricts you from altering the security settings. You are not prompted for a password to open the document, only if you try to change the security settings. Passwords are case sensitive and are required when applying encryption.
Choose passwords carefully. They should not be able to be guessed easily but at the same time should not be too difficult for you to remember. If you forget a password, there is no way to recover it from the document. Therefore, it is a good idea to note passwords in another secure location.
-userpass <password> — Set user password (optional)
Specifies a User password for the document. Setting a User password prevents a document from being opened unless the correct password is supplied. Passwords are case sensitive.
Below is the Document Open Password dialog box.
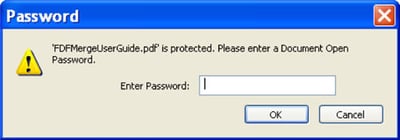
When someone tries to open the document in Acrobat they will be asked for the password.
User password is optional. If you do not specify a User password, anyone can open the document.
-onlyattach — Secure Envelope(optional) (SecurSign Only)
Utilize PDFs as secure envelopes; apply 256-bit AES security to PDF and non-PDF file attachments while leaving the PDF itself unencrypted.
-remove — Remove all encryption from the PDF document
Removing encryption from the PDF document requires the document owner password using -ownerpass.
-d <string> — Old owner password to decrypt the file (Not available for AppendPDF & AppendPDF Pro)
If a PDF file already has encryption set and you wish to change the settings or remove encryption (APCrypt/SecurSign only), you need to supply the owner password in order to make changes to the file.
Document Permissions
-noprint — Do not allow printing (optional)
Specifies that the document cannot be printed. When the document is opened, the print icon on the toolbar and the Print option under the file menu will be grayed out.
At the 128-bit and 256-bit encryption level there is also an option to allow low resolution printing only. See the section High-level encryption for more detail.
-nomodify — Do not allow modifying the document (optional)
Specifies that the document cannot be modified. You will not be able to modify text or pages in the document when this option is used. You can fill in form fields, or add notes or other annotations.
With -nomodify, the following tools are grayed out and cannot be used when the document is opened in Acrobat:
- Crop tool
- Movie tool
- Link tool
- Article tool
- Form tool
- Digital Signature tool
Text can be selected for copying but cannot be cut, pasted or cleared.
-nocopy — Do not allow copying text or graphics (optional)
Specifies text and graphics cannot be copied.
With -nocopy, the following tools are grayed out and cannot be used when the document is opened in Acrobat:
- Text Select tool
- Touch-Up Text tool
- Table/Formatted Text Select tool
-nonotes — Do not allow adding or changing notes or form fields (optional)
Specifies that annotations cannot be added or changed in the document. Annotations include notes, highlighted text, form fields and pencil marks. Annotations can be in text, graphic or audio format, or even attached external files.
With -nonotes, the following tools are grayed out and cannot be used when the document is opened in Acrobat:
- Notes tool
- Pencil tool
- Highlight Text tool
- Form tool
- Digital Signature tool
- Free Text tool
- Sound Attachment tool
- Stamp tool
- File Attachment
- Square tool
- Circle tool
- Line tool
-noaccess — Do not allow accessibility (optional)
Specifies content accessibility is not allowed. Content accessibility provides the vision and motion-challenged community with the tools and resources to make digital information more accessible. To learn more about content accessibility consult the Acrobat Help guide within Acrobat.
-nohighres — Do not allow high resolution printing (optional)
Specifies low resolution printing only. Acrobat prints each page as a low resolution (150 dpi) bitmap. The document cannot be recreated from these printouts.
-nofill — Do not allow filling form fields or signing fields
Specifies that no changes can be made to form fields or digital signature fields. This setting effectively prevents a filled-in form from being changed.
-noassembly — Do not allow document assembly
Specifies that no new pages can be added or removed from the PDF document. Also prevents rotating pages in the document. Effectively prevents pages being removed from the PDF document to be used elsewhere.
Permissions Allowed with 40-bit Encyption
The table below shows how the software application security options correspond to Acrobat’s security restrictions. The “Changes Allowed” column below lists the features still available after the document is secured.
| Option | Restrictions Set (Not Allowed) |
Changes Allowed |
|---|---|---|
| -nocopy | Content Copying or Extraction Content Accessibility |
|
| -noprint | Printing | |
| -nomodify -nonotes |
Changing the Document Document Assembly Authoring Comments and Form Fields Form Field Fill-in or Signing |
None |
| -nomodify | Changing the Document Document Assembly |
Commenting, filling in form fields, and signing |
| -nonotes | Authoring Comments and Form Fields | Page layout, filling in form fields, and signing |
| none | Any except extracting pages |
Permissions Allowed with 128-bit or 256-bit Encryption
Acrobat accepts certain combinations of the “Changes Allowed” options. The Changes Allowed options are:
- -nomodify — Do Not Allow Modifying the Document
- -noassembly — Do Not Allow Document Assembly
- -nonotes — Do Not Allow Adding or Changing Notes or Form Fields
- -nofill — Do Not Allow Filling In or Signing of Form Fields
The table below shows security options vs. restrictions set with high level encryption. These combinations are discussed below.
| Option | Restrictions Set (Not Allowed) |
|---|---|
| -noaccess | Content Accessibility |
| -nocopy | Content Copying or Extraction |
| -noprint | Printing |
| -nohighres | Only Low Resolution Printing is allowed |
| -nomodify -nonotes -nofill -noassembly |
Changing the Document Authoring Comments and Form Fields Form Field Fill-in or Signing Document Assembly |
| -nomodify -nonotes -nofill |
Changing the Document Authoring Comments and Form Fields Form Field Fill-in or Signing |
| -nomodify -nonotes -noassembly |
Changing the Document Authoring Comments and Form Fields Document Assembly |
| -nomodify -noassembly |
Changing the Document Document Assembly |
| none |
Allow no changes with -nomodify -noassembly -nonotes -nofill
Turning off all changes means: do not allow document modification (-nomodify), do not allow document assembly (-noassembly), do not allow the adding or changing of notes or form fields (-nonotes) and do not allow the fill-in or signing of form fields (-nofill). These options must all be used together for this setting to be made.
Allow inserting, deleting, and rotating pages with -nomodify -nonotes -nofill
This setting only allows document assembly.
These options specify: do not allow document modification (-nomodify), do not allow the adding or changing of notes or form fields (-nonotes) and do not allow the fill-in or signing of form fields (-nofill).
Allow filling in form fields, and signing with -nomodify -noassembly -nonotes
This setting only allows form field fill-in or signing.
These options specify: do not allow document modification (-nomodify), do not allow document assembly (-noassembly), and do not allow the adding or changing of notes or form fields (-nonotes).
Allow commenting, filling in form fields, and signing with -nomodify -noassembly
This setting allows the adding or changing of notes or form fields and the fill-in or signing of form fields.
These options specify: do not allow document modification (-nomodify), and do not allow document assembly (-noassembly).
Allow any except extracting pages with no options
If you don’t use any Changes Allowed options, Acrobat will allow any changes except extracting pages.
Verifying Security Features
To view the current security settings:
| Acrobat X, XI and DC | Select File > Properties. Click the Security tab, then click the Show Details… button. |
|---|
In the example shown below, both a User password and an Owner password are set, only low resolution printing is allowed, changing the document, content copying and extraction, authoring comments and form fields, and form field fill-in or signing are not allowed, content accessibility and document assembly are allowed and encryption is 128-bit.
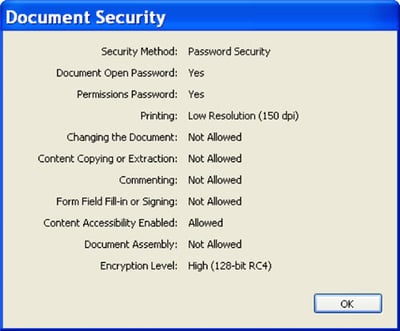
Examples
Here are some examples of using AppendPDF with encryption options.
Appending documents with 128-bit encryption
The default encryption is 128-bit so you do not need to specify -keylength unless you are using 40-bit encryption as shown in the second example below.
$ ./appendpro -p -encrypt -ownerpass Pa55w0rd -userpass paSsWoRd-nomodify -noassembly -nonotes -nofill -nohighres -nocopy./Samples/parameters.xml
The output file will be a new PDF document as specified in the parameters.xml file. The output PDF will be encrypted with 128-bit encryption, with owner and user passwords. It will not allow changes, high resolution printing, or copying the document.
Appending documents with 40-bit encryption
$ ./appendpro -p -encrypt -keylength 40 -ownerpass PaSsWoRd-noprint -nomodify -nocopy ./Samples/parameters.xml
The output file will be a new PDF document as specified in the parameters.xml file. It is secured with 40-bit encryption and an owner password against printing, modifying and copying.
Automating
In this chapter…
…we will discuss automating AppendPDF and AppendPDF Pro with scripts. Content that is specific to AppendPDF Pro is followed by the notation: (AppendPDF Pro only).
It is likely that you will wish to incorporate AppendPDF or AppendPDF Pro into scripts that you build to make appending and delivering documents an automatic process.
AppendPDF and AppendPDF Pro, as command-line driven applications, can be run from any programming or scripting language (or other application) that can make a call to a command line.
This is especially true for regular weekly and monthly reports, or web pages that contain variable information, but in a consistent or standardized format. For example: a monthly sales report can be automatically generated by programmatically selecting individual sales reports from a standard set of directories. In addition to appending the periodic reports into a single document, a cover sheet, table of contents, and bookmarks can be generated.
When AppendPDF or AppendPDF Pro is combined with Appligent’s FDFMerge product, an application that merges FDF data files with PDF forms, it becomes practical to generate a complete report from dynamic information that is either entered manually (for example, via web forms) or automatically using database queries. Individual standardized report sections can be automatically filled in and saved into a standard set of directories with standardized file names. These dynamically generated PDF sections can then be appended into a single document.
Be Aware of Your Options
In addition to dynamic control of automatic document generation via parameter files, you can dynamically utilize the AppendPDF or AppendPDF Pro command-line options to produce different output under different conditions. Options to consider when dynamically executing AppendPDF or AppendPDF Pro include:
- Showing Progress (-p) — An if statement can determine whether this is an interactive run or a background run and can then turn progress on or off as appropriate.
- Writing to a Log File (-l <logfile>) — This is usually a good idea for batch document processing. Either the same log file can be appended, or a new log started with each run. A sophisticated script could check the log for errors and e-mail the administrator with any problems.
- Adding Bookmarks (-b) — Whether a script is designed to be interactive or run in the background as a batch process, an argument can be set to turn bookmarks on or off according to user preference.
- Version Information (-v) — Using this option with the log file option will capture the product version information in the log file.
When dynamically generating a parameter file, you should consider such options as:
- Page ranges — Using page ranges lets you specify partial documents to be included, and the -1 notation can be used in a range to indicate the last page.
- Document info — Any information you would like to attach to a document can go into the Document Info area of the output file.
Dynamically Generate Parameter Files
One way to automate AppendPDF or AppendPDF Pro would be to avoid having to type in each of your source files in the parameter file by creating a simple shell script to enumerate the contents of a directory directly into the parameter file.
Dynamic parameter files may be generated from Perl, Java, VBScript, Tcl or any shell script. Developing scripts to generate parameter files is a more efficient approach to PDF document generation when the document contents, file paths, and parameters are variable. Such scripts are also easier to maintain than many separate static parameter files.
For larger batch document runs, you can take advantage of the ability of AppendPDF and AppendPDF Pro to process several parameter files at a time.
The dynamic generation of one or more parameter files enables you to utilize the full power of AppendPDF and AppendPDF Pro. Examples of some of these advanced capabilities, include:
Cover page block — AppendPDF Pro only
The user could select from a list of pre-made cover pages, or select from any desired combination of cover sheet and cover sheet stamps. This would permit periodic “standardized” reports to retain a fresh look with each edition.
TOC block — AppendPDF Pro only
In addition to turning Table of Contents (TOC) information on or off, the user could be given the option of determining the appearance of the TOC by selecting from a list of standardized fonts, font sizes and colors. The application of stamp(s) to the TOC (for example, page numbers) could also be optional. The user could even override the default section titles in the generated TOC.
Extras block — AppendPDF Pro only
Since Extras stamps are only applied to the body of the generated document and not to the Cover Page or TOC, the user can be encouraged to provide additional stamped information for the body, for example, in the page header and footer. Stamped information containing text strings can contain variable items. An appropriate stamp could be programmatically generated or selected from a pre-defined or pre-generated collection of stamp files (for example, one for each department, group, or individual for which the document is targeted).
Dynamically generate stamp files — AppendPDF Pro only
The same considerations that have been given to dynamic parameter file generation can be given to the dynamic generation of stamp files. By combining both techniques, an up-to-date or even fully custom document can be generated. Either the user or the program can provide values for such variables and attributes as:
- Text to be stamped
- Stamps for the cover page
- Stamps for the TOC
- Headers and Footers
- Watermarks (DRAFT, Confidential, etc.)
- Font, Font Size and Color of the Stamped Text
- Text Mode (solid, outline, invisible)
- Location or Position of the Stamped Text
- Pages (and pages within Sections) to receive a particular stamp
- % variables for dates, times, page numbers and section numbers
Since AppendPDF Pro is sensitive to the exact format of stamp files, it is very important to understand the format requirements and that the program or script generates only well-constructed stamp files (for example, balanced parentheses, % signs, etc.).
Develop Large Documents in Stages
Large documents should be developed in stages, rather than in a single AppendPDF or AppendPDF Pro execution, so the results of each processing stage can be checked before proceeding. Customizations can be applied to each individual stage as well as to the final document as a whole. All of this “multi-stage” processing could be accomplished under the control of a single program or script, for example, a period (daily, weekly, monthly) report or web-content generation program.
AppendPDF and AppendPDF Pro can be integrated into a program or script that generates multiple parameter files, then executes AppendPDF or AppendPDF Pro to compile various “Sections” or “Chapters”. Then after error checking, append the resultant PDF documents into a single complete PDF document. A file listing all parameter files can be used as the input to a script for a single execution of AppendPDF or AppendPDF Pro.
The illustration below shows appending multiple sections in stages with AppendPDF Pro. When running AppendPDF, there will be no Table of Contents (TOC) or cover page generated since AppendPDF does not have those features.
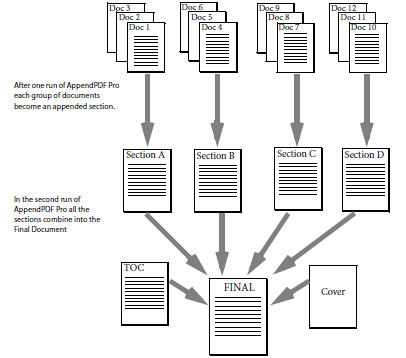
Error Checking
When dynamically generating parameter files and executing AppendPDF or AppendPDF Pro with various option settings, it is important to perform checks in your scripts to eliminate or minimize possible errors that may otherwise occur. Common errors to search for:
- source file path strings for internal spaces—especially true of MS Windows file names
- source file path strings for internal commas
If errors are found, then the script or program can report them and log them and either halt the AppendPDF or AppendPDF Pro run or skip the appending of the erroneous files such as a section or chapter. A script could also insure that file paths are processed properly by surrounding the paths with double quotes.
A complex script or program could perform an operating system level check for the existence of each file path and check to make sure the read-permission is correct before proceeding.
When generating even moderately large or complex documents into “compound documents” that include separate sections, a cover page and a TOC (AppendPDF Pro only), it is prudent to programmatically check the results (return codes, error log contents, etc.) of each step before proceeding to the next, thus eliminating an attempt to append all of the components into an incorrectly created document.
Command Line Introduction
Introduction
AppendPDF is a command-line application. If you are used to the Microsoft Windows or Apple Mac OS X operating system, you may not be familiar with running command-line tools. This section shows you all you need to get started.
- Windows tells you how to use AppendPDF on Windows.
Note: You can refer to the Getting Started With Command Line Applications for additional information on using command-line applications.
Windows
To run AppendPDF in Windows, you need to open a Command Prompt window.
In Windows 7:
- Click Start > Programs > Accessories > Command Prompt
In Windows 10:
- Click Start > Windows System > Command Prompt
The Command Prompt window opens.
Some basic commands
At the command prompt, you type each command, and press the Enter key to execute it. You can use the mouse to select text to copy or cut to the clipboard, but you cannot position the cursor with it. The command line is completely keyboard driven. Navigation keys are shown below:
| Key | Action |
|---|---|
| Backspace | Delete previous character |
| Right arrow | Move right one character |
| Left arrow | Move left one character |
| Up arrow | Recall previous command |
| Tab | File or directory name auto complete |
| Enter | Execute command |
In addition to running programs, you have many commands to navigate and maintain the system. Two important ones are cd and dir.
Changing directories
Use the cd command to change directories. For example, to change to the directory that AppendPDF is located in, type:
C:\>cd \Appligent\AppendPDF\
The command prompt changes to:
C:\Appligent\AppendPDF>
to show you where you are.
To move back one level, use the shortcut of two periods (..)
C:\Appligent\AppendPDF>cd..
Don’t forget to press the Enter key after every command. You will now be in this directory:
C:\Appligent>
Move back to AppendPDF:
C:\Appligent>cd AppendPDF
Listing the contents of a directory
Use the dir command to list the contents of a directory:
C:\Appligent\AppendPDF>dir
The computer responds with a listing of all the contents of the AppendPDF directory.
If the directory contents fly by too fast to read, do this:
C:\Appligent\AppendPDF>dir /p
The /p switch tells DOS to display one page at a time. Press the Enter key to see the next page.
To see the contents of all the subdirectories at the same time, type:
C:\Appligent\AppendPDF>dir /s
This displays the contents of AppendPDF and all the subdirectories under it.
Running AppendPDF
To run AppendPDF, type the commands on the command line as shown in other sections of this manual and press Enter. In the next example, we’ve truncated the command prompt path for clarity. A simple command would be:
> .\appendpdf \path\samples\parameters.xml
The parameters.xml file contains all the parameters to create a complete compiled PDF document.
Now, refer to the rest of this User Guide for details about using AppendPDF.
Troubleshooting
In this chapter…
… we present a collection of hints and tips for working with AppendPDF and AppendPDF Pro. If you are having trouble with the software, consult this list of issues for a possible solution.
Common error checklist
Before proceeding, if you are having problems with your PDF files, check that they are well-formed and not corrupt. Refer to Cleaning Up PDF Documents.
- AppendPDF or AppendPDF Pro will not work properly with files that contain active form fields. You must flatten the form fields before running the files through AppendPDF or AppendPDF Pro.
- AppendPDF or AppendPDF Pro will not work with encrypted or write-protected files. Full permission on all files and paths is required for AppendPDF or AppendPDF Pro to work properly.
- When using the log file option, -l, there must be a log file name immediately following the -l option. If there is no file name, AppendPDF or AppendPDF Pro will not process and an error message will be appended to the bottom of your parameter file.
- Make sure all file and path names are correct. If you are working in one directory and AppendPDF or AppendPDF Pro resides in another, you must account for that in your parameter file and command line. We recommend that you always use full paths to all files used in your parameter file.
For parameter files:
- Be aware that if even one path or file name is wrong in your parameter file the entire append will fail.
- Recheck the construction of the parameter file. Misspelled keywords (i.e., BeginSource instead of begin_source in the text parameter file) or keywords left out will cause AppendPDF or AppendPDF Pro to fail. For xml parameter file, make sure tags are balanced, each tag has a begin and end tag: <inputpdf>file.pdf</inputpdf>
- Make sure there are no commas in filenames. AppendPDF or AppendPDF Pro will try to interpret the commas as part of a page range for the document.
- Make sure there are no spaces in source file entries. All items in the source files block of the parameter file should have no spaces between filename, commas, and page numbers.
- Make sure there is at least one space between an individual parameter and the parentheses that hold the value for that parameter, like this:
parameter1 (value)
parameter2 (value)
- Comments must be at the beginning of a line and start with the # symbol. If you are using comments in your parameter file, make sure they start at the beginning of a line.
- A parameter file should contain only one source files block. AppendPDF and AppendPDF Pro will ignore any source files block after the first one. Add all files to be appended together into one block. Use multiple parameter files to generate multiple output PDF files.
Cleaning Up PDF Documents
Not all PDF files are created equal. The way in which a PDF document is generated makes a difference, and PDFs generated by third party tools in particular can vary in quality. PDF documents can also become corrupted.
To check how the file was created:
- In Acrobat X, XI and DC select File > Properties… and click Description. Under Advanced, look at PDF Producer.
If the PDF Producer field is blank, consider the file suspect.
Making a Clean PDF
If you are having problems with a specific PDF, try to create “clean” version of your document. There are two ways of doing this using Adobe Acrobat. If you use other PDF manipulation software, check the documentation for functions that may be equivalent to those found in Adobe Acrobat.
Method 1: “Optimize” your PDF
- In Acrobat X, XI and DC > File Menu > Save As > Optimized PDF
If saving as optimized does not work, distill the document by following the steps below.
Method 2: Distilling PDF Documents
Distilling a document will remove all comments and form-fields from the PDF. If the PDF contains these items and you wish to preserve them, you must save them before Distilling.
To save existing comments
- In Acrobat X, XI and DC select Comments > Comments List > click the Options icon > Export All to Data File… In the Export Comments dialog box, select a name and location for the Forms Data File (.fdf), and click Save.
See the additional step below for saving form fields (if any):
Delete all comments:
- In Acrobat X, XI and DC select all the comments in the Comments List pane and press the Delete key.
To save form fields (if any):
- Save a copy of the original file. You will copy and paste the form fields from the original file into the new file after the distilling procedure.
Distilling the document
To distill a PDF document do the following:
- In Acrobat X and XI select File > Save As > More Options > PostScript. Choose a name and location for the file and click Save.
- In Acrobat DC select File > Export to > PostScript. Choose a name and location for the file and click Save
- Open Acrobat Distiller > select File > Open… In the Open PostScript File dialog, locate the PostScript file created in the previous step and click Open.
The distiller will create a new PDF file with the same name and location as the PostScript file.
Restoring comments
To restore the comments:
- In Acrobat X and XI, select Comments > Comments List > click the Options icon > Import Data File… In the Import Comments dialog box, locate the Forms Data File (.fdf) previously saved and click Select. In the next pop-up box, click Yes. The comments are restored.
- In Acrobat DC, select Tools > Comments > Comments List > click the Options icon > Import Data File…In the Import Comments dialog box, locate the Forms Data File (.fdf) previously saved and click Select. In the next pop-up box, click yes. The comments are restored
Restoring form fields
To restore form fields:
- Open the original PDF file that includes form fields.
- In Acrobat X and XI select Tools > Forms > Edit Form)
- In Acrobat DC > select Tools > Prepare Form > Form fields will automatically appear
- The form fields will appear, do a Control-A to select all the form fields.
- Open the new distilled PDF file which has no form fields.
- Do a Control-V to paste all the form fields onto the page.
You may need to reposition the fields by selecting them again with the Select Object Tool and moving them to the correct position. For multi-page forms you must do this for each page separately.
Support
Telephone & Fax
- Telephone: +1 610 284 4006
- Fax: +1 610 284 4233
A member of our friendly, knowledgeable support staff will reply as soon as possible, generally within one business day.
International Support
Customers from locations outside the United States, including Germany, United Kingdom, Canada and Australia can contact us directly or connect with one of our many resellers.
When contacting support please provide the following information:
- Name of the Product
- Product Version Number
- Operating System
- Your Name
- Company Name
- Your Email Address
- Your Phone Number
- Product Registration Number
- Any files to help us reproduce your problem (if needed)
AppendPDF Pro Readme
New Features
AppendPDF Pro 6.4
New stamp file parameters:
New options for StartPage and EndPage
-1 represents the last page of the PDF file to be stamped. You can now use -2 for the second to the last page to be stamped, -3 for the third to the last page to be stamped and so on.
BarText – This parameter allows you to show or hide the text for barcode stamps. The default is to Show text. Options for this parameter are Show or Hide.
New command line options:
-vardelimiter – Delimiter character for variables in the stamp file (default is %)
AppendPDF Pro 6.0
Command line options:
–vars: List of variables to be substituted in the stamp file (“name,value,name,value”)
AppendPDF Pro now has the ability to dynamically replace variables found within the stamp file, and thus substitute the text that is stamped based on parameters set on the command line.
–portfolio – PDF Portfolio combines multiple files into one, regardless of file type. PDF Portfolio allows you to insert documents without altering the content of the original files.
Please see the AppendPDF Pro Options for the full documentation of the new features.
AppendPDF Pro 5.5
-listfonts – display a list of the fonts available to AppendPDF Pro
-u <string> – Remove old stamps set with an UndoLabel
*If a stamp does not have an UndoLabel specified in the stamp file, you will not be able to remove it later. The parameter should be set in the stamp item as shown below:
UndoLabel (remove)
Example of command line to remove stamps:
appendpro –u remove param.txt
When removing stamps, you must also run AppendPDF Pro with a parameter file.
Support for CJK on TOC page – CJK characters are now supported for TOC entries. You need to specify a CJK font in the TOC section of the parameter file.
Example: <fontname>KozMinPr6N-Regular</fontname>
Font Support for stamping
Base14, OpenType, TrueType, Type 1 and Unicode fonts are all supported in AppendPDF Pro for stamping. In previous version, Type 1 fonts were used in AppendPDF Pro by including the FontFile parameter in the stamp file. In AppendPDF Pro 5.5, you should only specify the font name.
In order to use a non-Base 14 font, the font must be stored in one of the Appligent font directories. You can run the command:
$ appendpro –listfonts
to see a list of all the font names available for stamping. The font name should be used exactly as it is shown in the font list.
NOTE: Some of the classic Base 14 fonts are no longer included with the application resources. In particular Times and Helvetica. Both of these fonts are automatically substituted; but, may not appear identical to the classic fonts. If the new font appearance are not acceptable, simply use the versions of Times and Helvetica available on your system. This can be done by setting the Font Directories; please see below.
Font Directories:
There are two font directories.
The default font directory is found under the AppligentHome directory in APDFL10.1.0a/Resource/Font. On Windows, the AppligentHome directory is in the AllUsers Application data directory:
Windows XP: C:\Documents and Settings\AllUsers\Application Data\Appligent
Windows Vista and later: C:\ProgramData\Appligent
Unix: /usr/local/Appligent
You can also specify an additional font directory, the AP font directory. The path to the AP font directory is saved in an environment variable called AP_FONT_DIR. You will be prompted to enter a font directory during installation.
On Windows: Environment variables can be set on Windows under the System Properties. To display System Properties, right click on “My Computer” and select properties. On the bottom of the Advanced tab, click the button labeled “Environment Variables”. Under system variables, you will see an entry for AP_FONT_DIR. Select this entry and click edit. You can then change the variable’s value to the path of the current font directory. If the AP_FONT_DIR variable is not there, you will need to add it.
On Unix: As the other environment variables for AppendPDF Pro, AP_FONT_DIR is set in the appendpro script. The directory set in an environment variable in the script, or be set for the shell.
Encoding (required for Unicode fonts)
Unicode fonts require an encoding parameter when stamping. The encoding parameter should be set to the following values depending on the type of text used:
Encoding (UTF8)
The possible values for encoding are:
Non-CJK text UTF-8
Japanese text UniJIS-UTF16-H
Korean text UniKS-UTF16-H
Simplified Chinese text UniGB-UTF16-H
Traditional Chinese text UniCNS-UTF16-H
Change in behavior version 5.5
Options set in Advanced Tab of first input PDF file are copied over into the output appended document. In previous versions of AppendPDF, if for example Language was set in the first input PDF, it was not copied into the appended document.
Document property information was not getting overwritten in the output file if the first input PDF already contained data in the fields (Title, Author, Subject). In version 5.5, document property fields are now properly updated with information set in the parameter file.
AppendPDF Pro 5.1
• -cmds <filename>
To process multiple commands quickly and efficiently, use the -cmds <filename> option. The file specified by -cmds, the commands file, should contain one or more single line commands. Each command is just like an ordinary AppendPDF Pro command line without the executable name. The commands file does not support wildcards in filenames.
When you use the -cmds option, many of the AppendPDF Pro options should be set in the -cmds file instead of on the command line. The following options are supported on the command line when using the -cmds option:
-r, -l, -n, -p.
If the same option is set on the command line and in the -cmds file, the option value from the -cmds file will be used.
For more information on the -cmds option, see Command Collections.
AppendPDF Pro 5.0
• For document optimization, use -optimize. This flag reduces file size in most instances, and performs a variety of functions.
- encode any non-encoded streams using Flate compression
- remove ASCII85 filters from all streams
- replace LZW encoded streams with Flate encoding
- merge identical XObjects and images
- optimize common sequences in page content
- merge identical font descriptors and encodings
• To maximize compression, use -comp. This flag will apply object level compression, typically reducing file size by 2%.
Note: PDF files support the simultaneous use of multiple types of compression. Object level compression was developed by Adobe® Systems to reduce the size of PDF files, with a typical reduction of 2%. The object level compression mechanism is not always understood by older versions of Acrobat® or third party PDF software, and limits compatibility to Acrobat 6 or higher.
• To not use object level compression, use -nocomp. This flag will not add object level compression and will remove object level compression, if found, resulting in a document that is compatible with all versions of Acrobat.
• To create an ISO 32000 compliant PDF, use -iso32000. This flag sets the output file version for ISO 32000 compliance (Adobe PDF version 1.7).
• -b on command line: All bookmarks from the original files are copied into the appended document. NEW behavior for version 5.0: If an input file does not have ANY bookmarks, a top level bookmark is created. The name of the bookmark will be the “Title” of the PDF. If there is no “Title” set, then the name of the PDF will be the name used for the bookmark. JavaScript bookmarks are now also supported. Top level bookmarks are always expanded.
• -extra: This flag will copy any named destination bookmarks/links, and article threads into the appended document. If this flag is on the command line AND a page range is specified for an input file, no extra bookmarks or article threads will be copied over into the appended document.
AppendPDF Pro 4.3
• New XML Parameters: Additional functionality has been added to the XML which provide more control over the appearance of the output PDF document.
- <extras>: This new element specifies additional attributes you may want to define for the output file.
- <opentopage>: The page number at which to open the document.
- <openmode>: Specifies what is displayed when the document opens in Acrobat. Options for openmode are:
- <showbookmarks>: The document opens with the bookmarks navigation panel showing
- <showthumbnails>: The document opens with the thumbnails navigation panel showing.
- <shownone>: The document opens with no navigation panels showing.
- <fullscreen>: The document will open in the fullscreen mode.
- <viewmode>: Specifies the zoom level when the document opens. Options for viewmode are:
- <bookmarkmode>: Specifies the initial state of the document’s bookmarks in the navigation pane. This does not affect the visibility of the bookmark pane.
- <openbookmarks>: Expands the bookmark list to show all bookmarks in the navigation pane when the document is opened.
- <closebookmarks>: Collapses the bookmark list to show only the top level bookmarks in the navigation pane when the document is opened.
- <openlevel>: Expands the bookmark list through level n. For example, n=3, all bookmarks up to and including the third level are shown. The fourth and higher level bookmarks are collapsed.
- <layoutmode>: Specifies the display page layout when the document opens.
- <single>: Displays one page at a time.
- <onecolumn>: Arranges the pages in a continuous vertical column.
- <twocolleft>: Arranges two pages side by side, the first page on the left.
- <twocolright>: Arranges two pages side by side, the first page on the right.
- <displaymode>: Specifies the window display mode when the document opens. You can specify more than one option.
- <hidetoolbar>: Specifies that the tool bar will not be displayed when the document opens.
- <hidemenubar>: Specifies that the menu bar will not be displayed when the document opens.
- <hidewinui>: Specifies that window controls will not be displayed when the document opens.
- <fitwin>: Resizes the document window to fit the first page when the document opens.
- <centerwin>: Centers the document window on the screen when the document opens.
- <showtitle>: Displays the document title, rather than the filename, on the title bar and the Windows menu.
Fixed Issues
• -n — Do not write anything to screen: The option to not write anything to the screen (or STDOUT) now works.
• Stamping of JPEG images: Images now stamp correctly on rotated pages.
• Links with named destinations: Articles and threads can be copied into the appended document by including the -extra flag on the command line.
Known Issues
Miscellaneous
• If running with a TOC page, you must be sure to include -b to get TOC bookmarks
• %P variable: If %P is used to stamp the full pathname to a file AppendPDF Pro stamps the temp directory along with a temp name.
• If a TOC entry contains an xml entity, the output file is not always correct. The TOC page at times will be blank or not include all files and the bookmark name will be the title of the PDF instead of what is set for the TOC entry.
• Stamping and Setting Doc Info: There is an occasional problem with setting and stamping document information (title, author, subject) on documents.
Color Space Parameter
The parameter ColorSpace is deprecated in stamp files. The color values you use determine the color space. Any value entered for ColorSpace is ignored. If you combine color values (for example, specify Color and Red, Green, Blue, the last value specified is the one used.
For example, in older builds the following would be gray:
ColorSpace (DeviceGray)
Color (90)
Red (0)
Green (0)
Blue (0)
Now it would be black.
The ColorSpace parameter is still used in the parameter files for the TOC entry. See the chapters TOC Color Space – XML and The Table of Contents Block – Text for information about the use of the ColorSpace parameter in those files.
Unicode Stamping
• Multi-line stamps may be slightly off position.
• Automatic word wrapping is not available for Unicode characters. You must manually insert line breaks and set the MultiLine parameter to Yes.
• Angled text is not supported. This includes the Position parameters Diag-TopLeft, Diag-TopRight, and Angle.
• Variables (%x) are not supported in a Unicode stamp.
Verification of Correctly Formed XML Files
Occasionally, AppendPDF Pro will not verify a correctly formed XML file when the DTD is included in the XML file. AppendPDF Pro returns the error message “Error in parameter file.” To run a file that gives this error with AppendPDF Pro, remove the DTD from the XML file. Since references to “DTD” have been removed in the Guide, do you want to remove this little section?
Form Fields
Form fields are incompatible with AppendPDF Pro. If your document has form fields, AppendPDF Pro will not rebuild the form tree within the PDF document following the append operation. Thus, form fields will not function properly after being appended.
Linking problems
When portions of documents are appended, links in the appended section will work only if they link to a page within that section. If multiple sections of the same document are appended, links between those sections will not work.
Table of Contents
• The linespace parameter available in the TOC (Table of Contents) block does not account for multi-line TOC entries. The new option of appendblanklines allows you to control the space between TOC entries, or space between page numbers. This parameter adds blank lines after the last line of the TOC entry, using the value of LineSpace. Without appendblanklines set, AppendPDF Pro counts line spaces from the first line of the TOC entry.
• Active links created on the Table of Contents page take up three vertical lines instead of one. Consider keeping linespace greater than one to avoid links overlapping.
Page numbers in stamp files
Page numbers specified in stamp files (i.e., StartPage) need to be Acrobat page numbers and not the page numbers as defined by AppendPDF Pro. Acrobat page numbers are the page numbers as they appear in your Adobe Acrobat window (i.e., 3 of 20). If -f is used page counting will begin on the cover page and AppendPDF Pro numbers will be the same as Acrobat numbers. If -f is not used, page number counting is reset to 1 at the start of the body of the appended document (this will not correspond to the 3 of 20 in your Acrobat window). Therefore, be sure to refer to the page numbers as they appear in Acrobat when specifying pages in stamp files.
Fonts
• The Symbol and Zapf Dingbats fonts do not work reliably in either Table of Contents (TOC) entries or other stamp files.
• Base 14 fonts are listed in the documentation with the following names: Courier, Courier-Bold, Courier-Oblique, Courier-BoldOblique, Helvetica, Helvetica-Bold, Helvetica-Oblique, Helvetica-BoldOblique, Times-Roman, Times-Bold, Times-Italic, Times-BoldItalic, Symbol and ZapfDingbats. While it is imperative that the font name is spelled correctly in order to be used within the software, there is some leeway with spaces and hyphenation. For example: Courier-Bold can also be given as Courier Bold or CourierBold. The way they are listed in the documentation is how they are defined in the Adobe Type Manager®.
• If you are using Adobe PostScript Type 1 fonts in stamp files, be sure that you do not have a TrueType version of the same font on your system. This will cause AppendPDF Pro to work improperly. No error will be raised when AppendPDF Pro runs, but the processing will not have worked properly and will be visible on the completed output. (This behavior will also occur if a document created with a Type 1 font is imported to a system that has installed the TrueType version of that font.)
Bookmarks
Do not use bookmarks in the files that you provide for the Cover and Table of Contents pages. AppendPDF Pro will supply them on its own.
To Get Help
Contact technical support by:
emailing support@appligent.com, or calling 610-284-4006
Please provide the following:
Product name and version number
Operating system
Your name, company name, email address, and phone number
Description of your question or problem
Responses are typically emailed within one business day.